How to Configure Okta SAML SSO for Yoffix
Yoffix supports Single Sign-On (SSO) via Okta using SAML 2.0.
This allows users to sign in to Yoffix using their Okta credentials, ensuring centralized authentication and access control.
For other supported SSO providers please see the dedicated pages
All SSO settings in Yoffix are available under:
Settings → SSO
How to Set Up the Integration
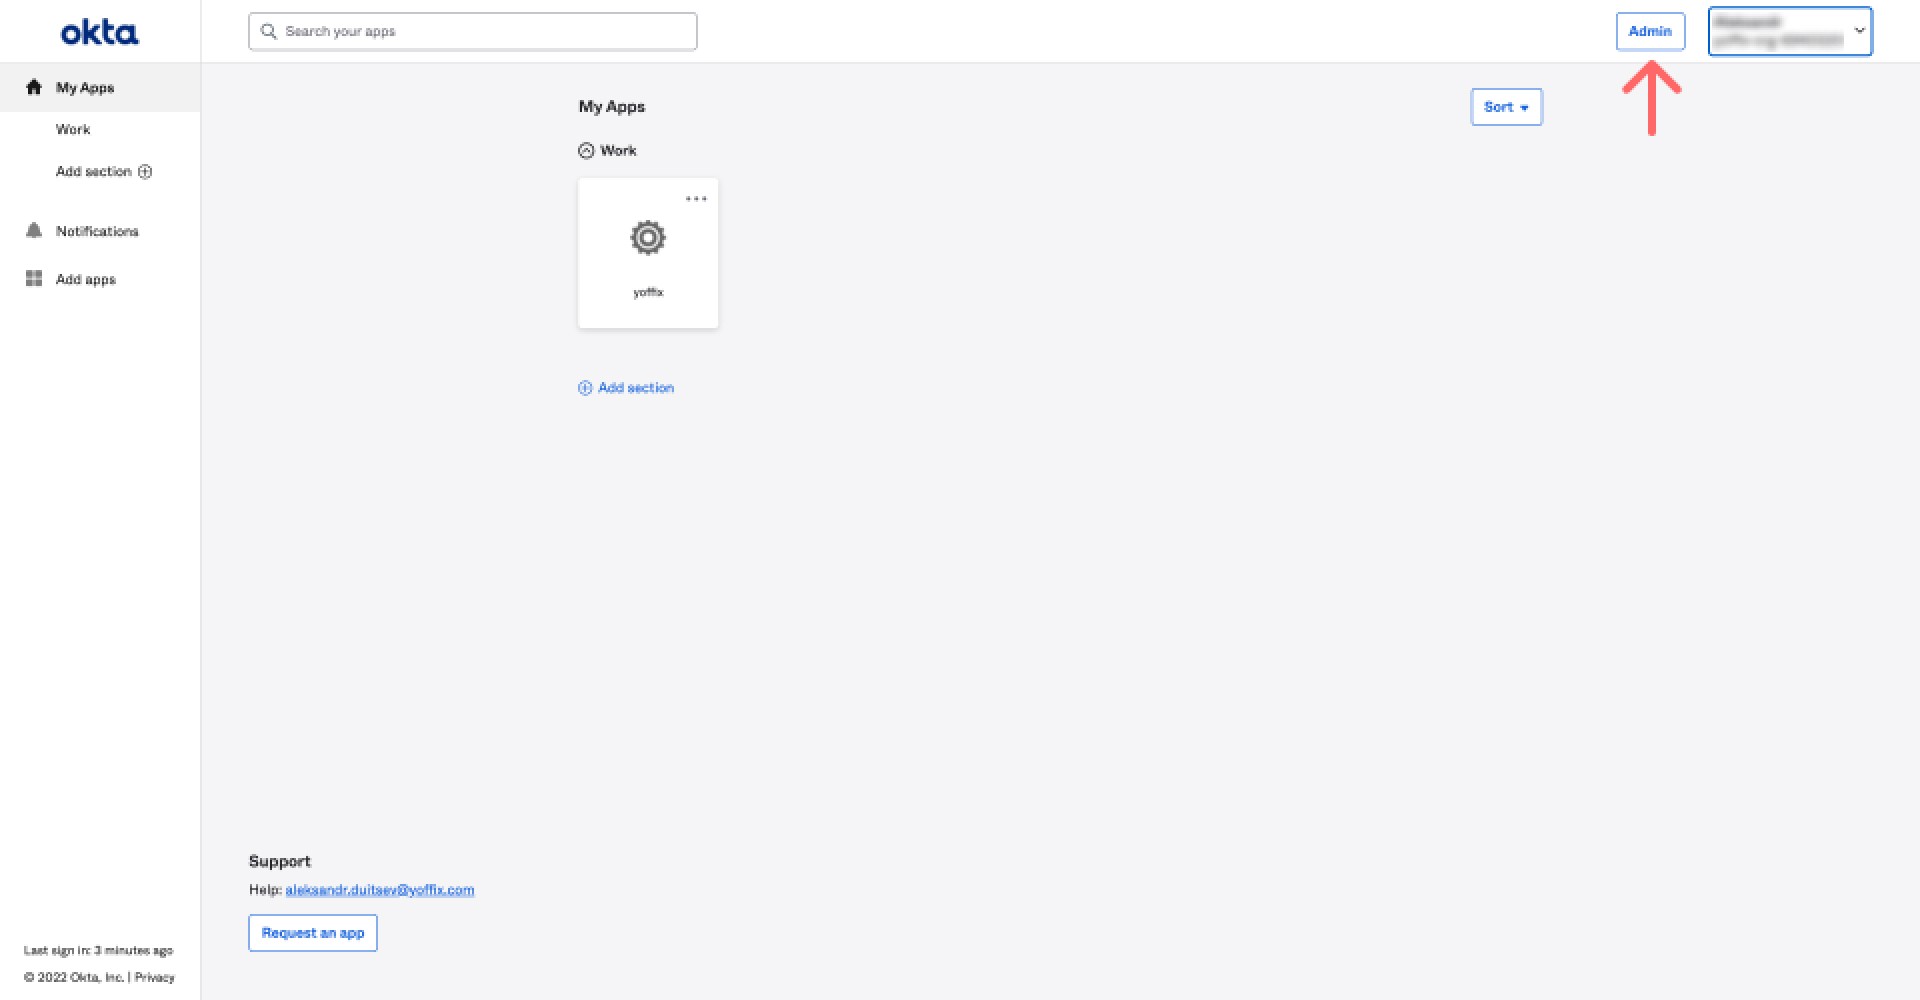
Step 1: Log in to Okta Admin Dashboard
Go to:
https://<yourdomain>.okta.comClick Admin in the top right corner.
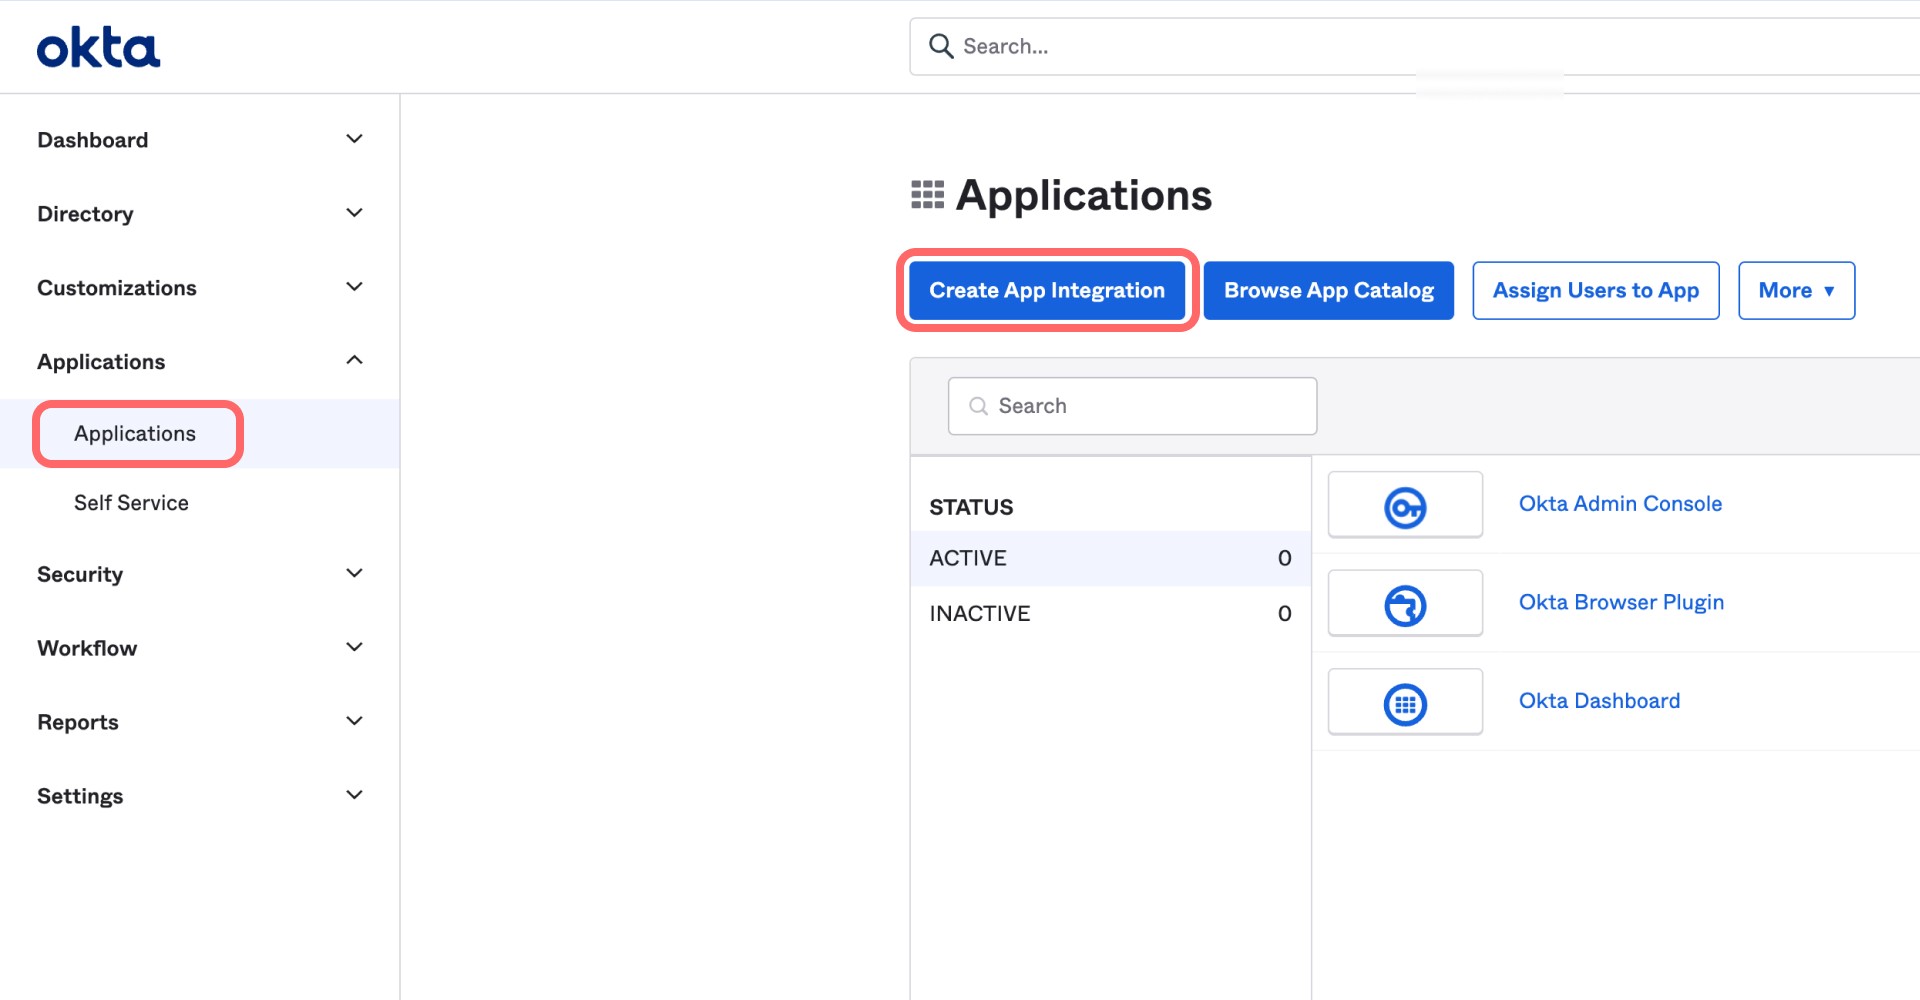
Step 2: Create a SAML 2.0 Application
Navigate to Applications and click Create App Integration
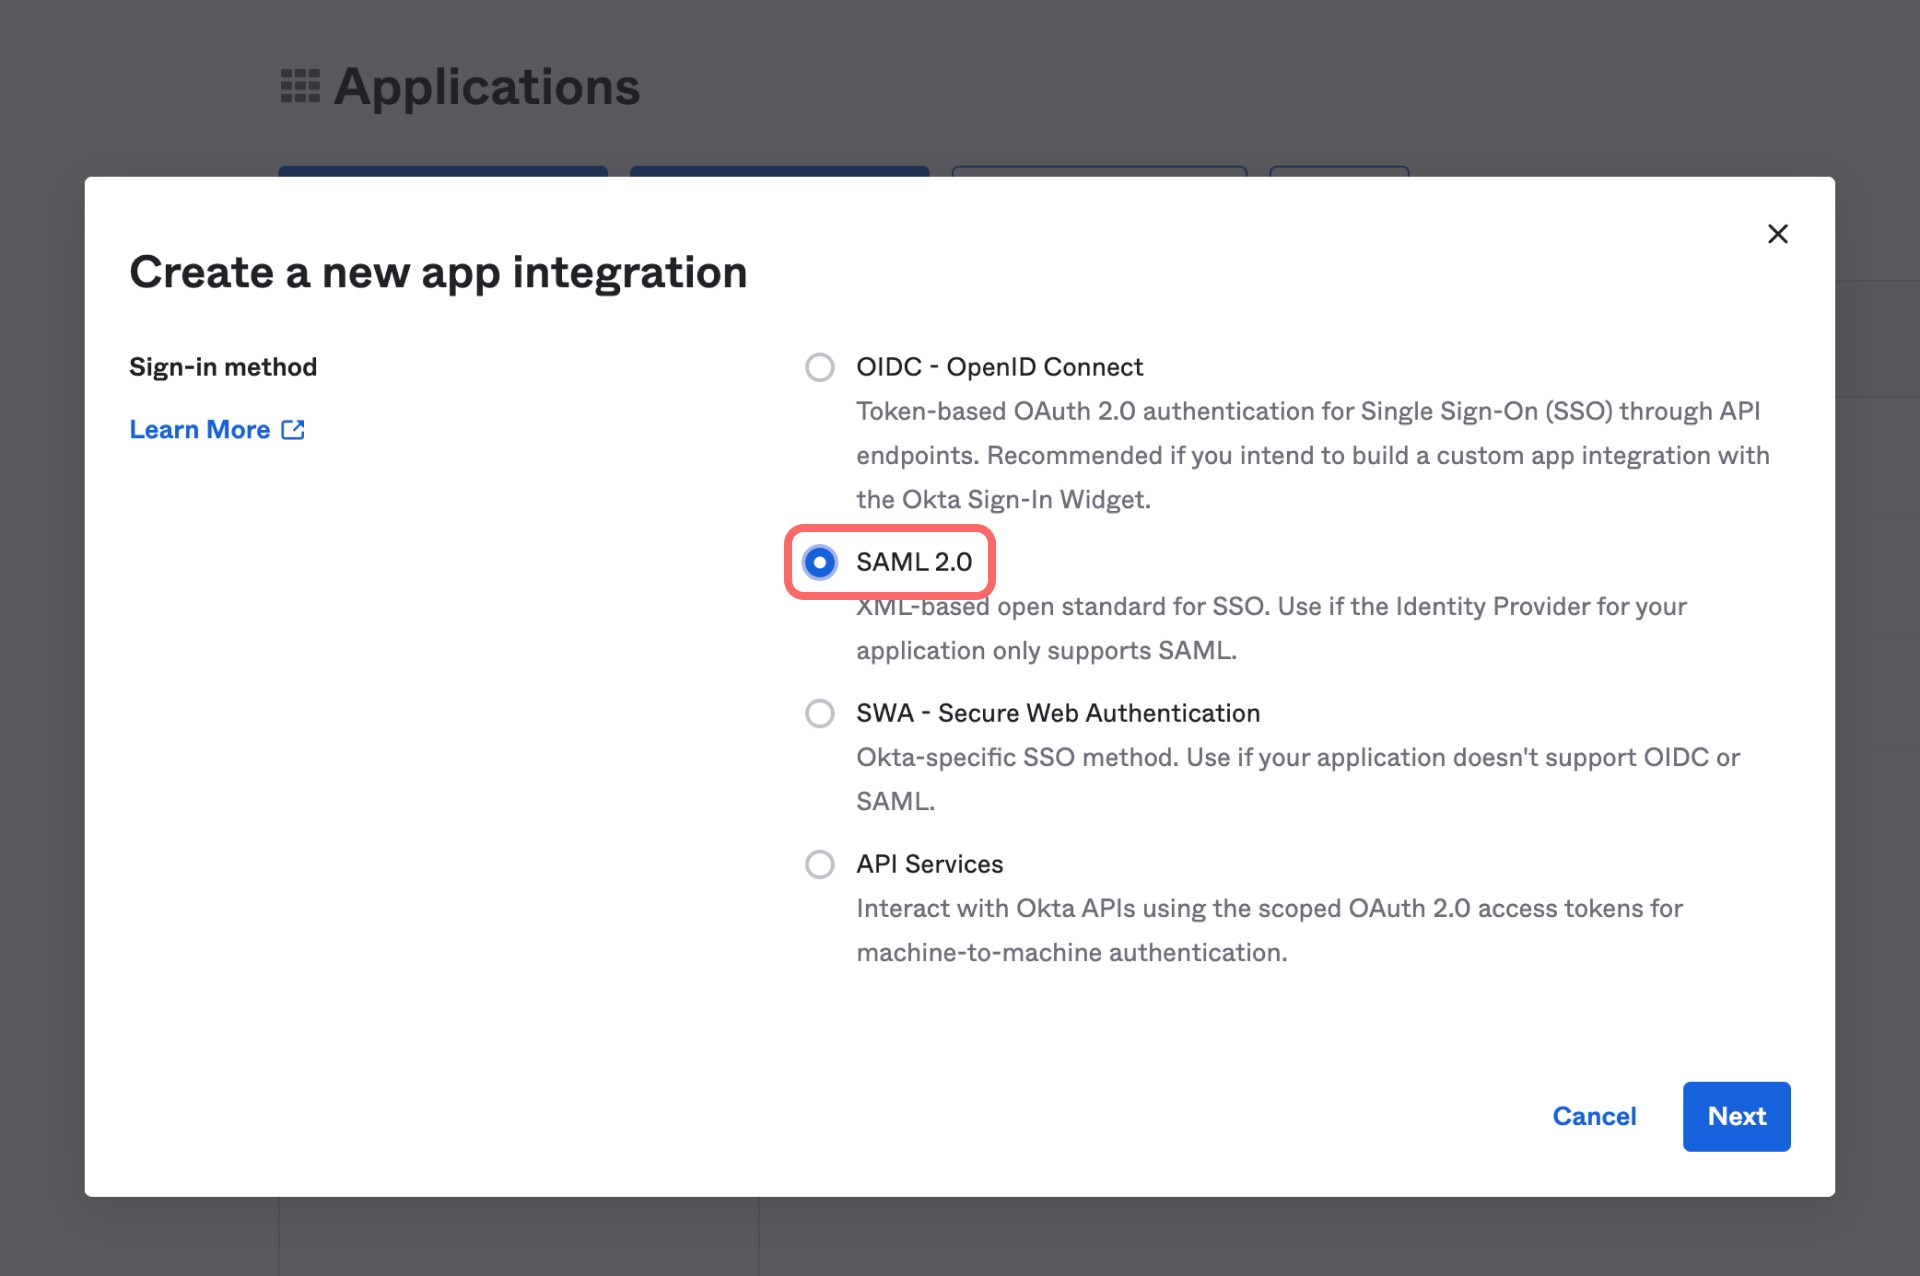
Select SAML 2.0 and click Next
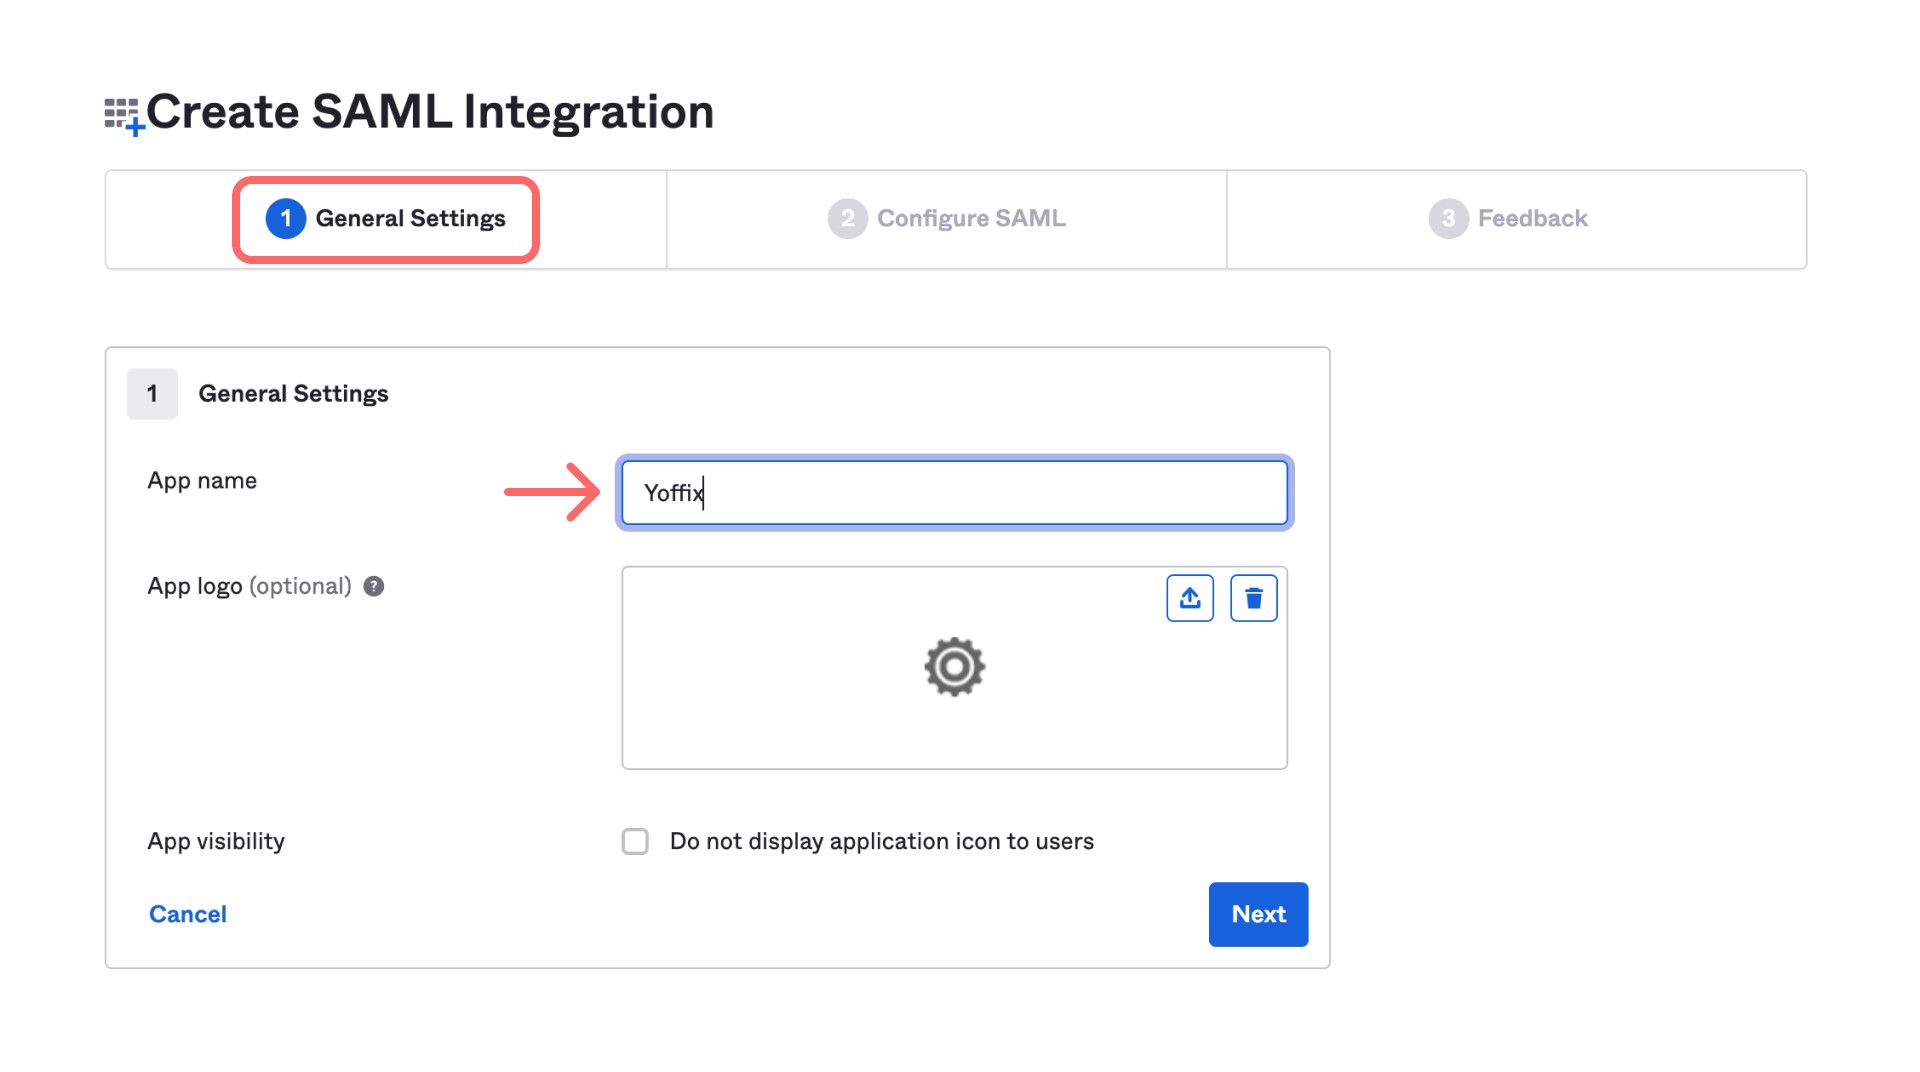
On the General settings tab enter App name (Yoffix) and click Next
Step 3: Configure SAML Settings
Enter the following values:
Single sign-on URL (ACS URL):
https://api.app.yoffix.com/sso/saml/assertAudience URI (SP Entity ID):
https://api.app.yoffix.com/sso/saml/metadata
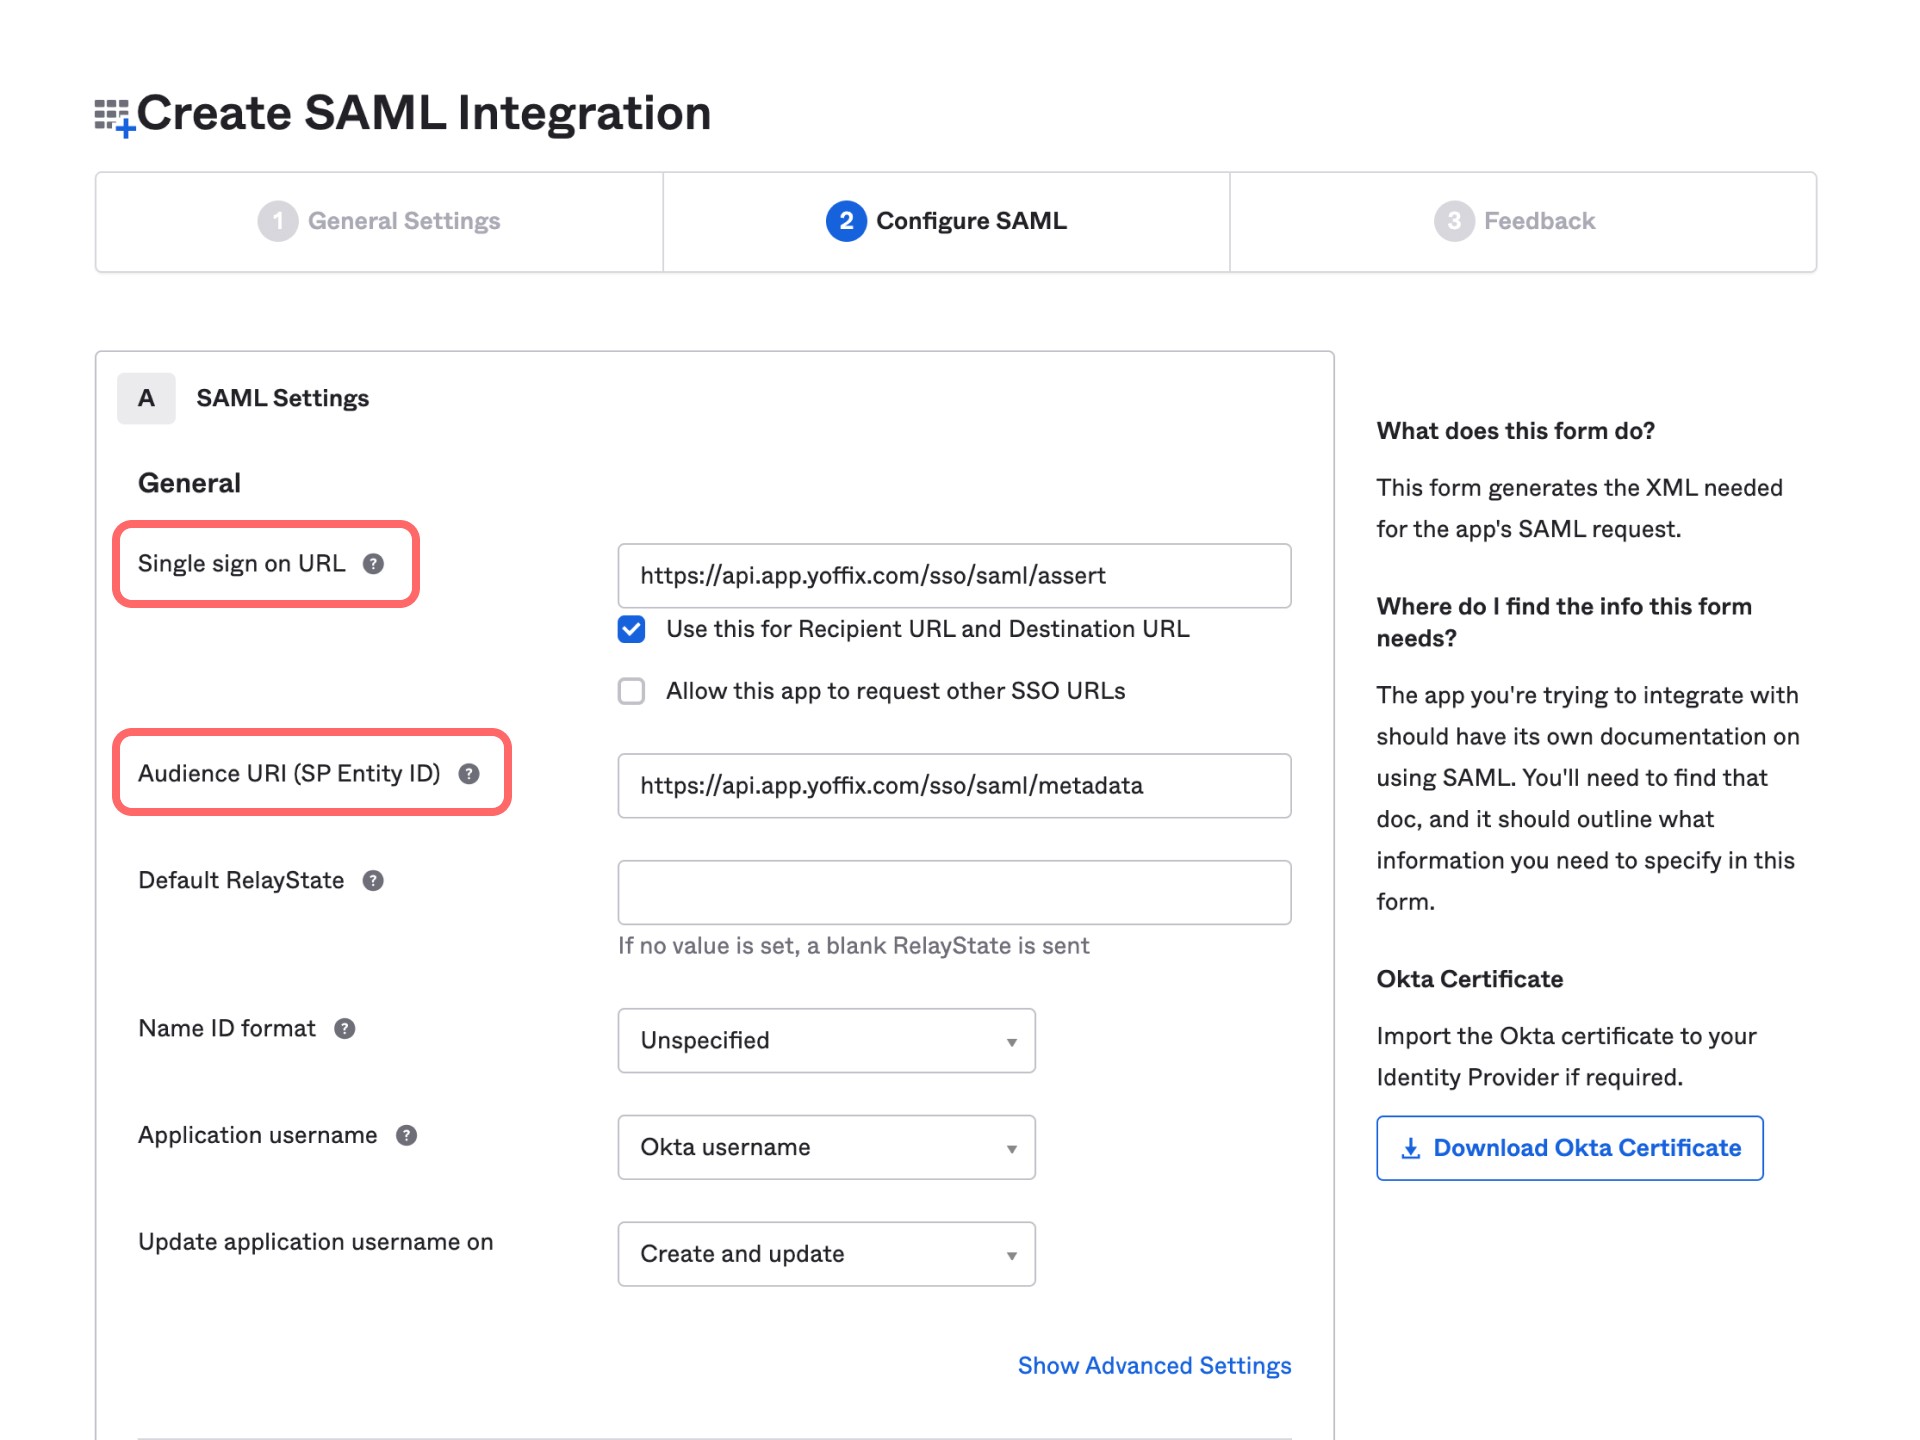
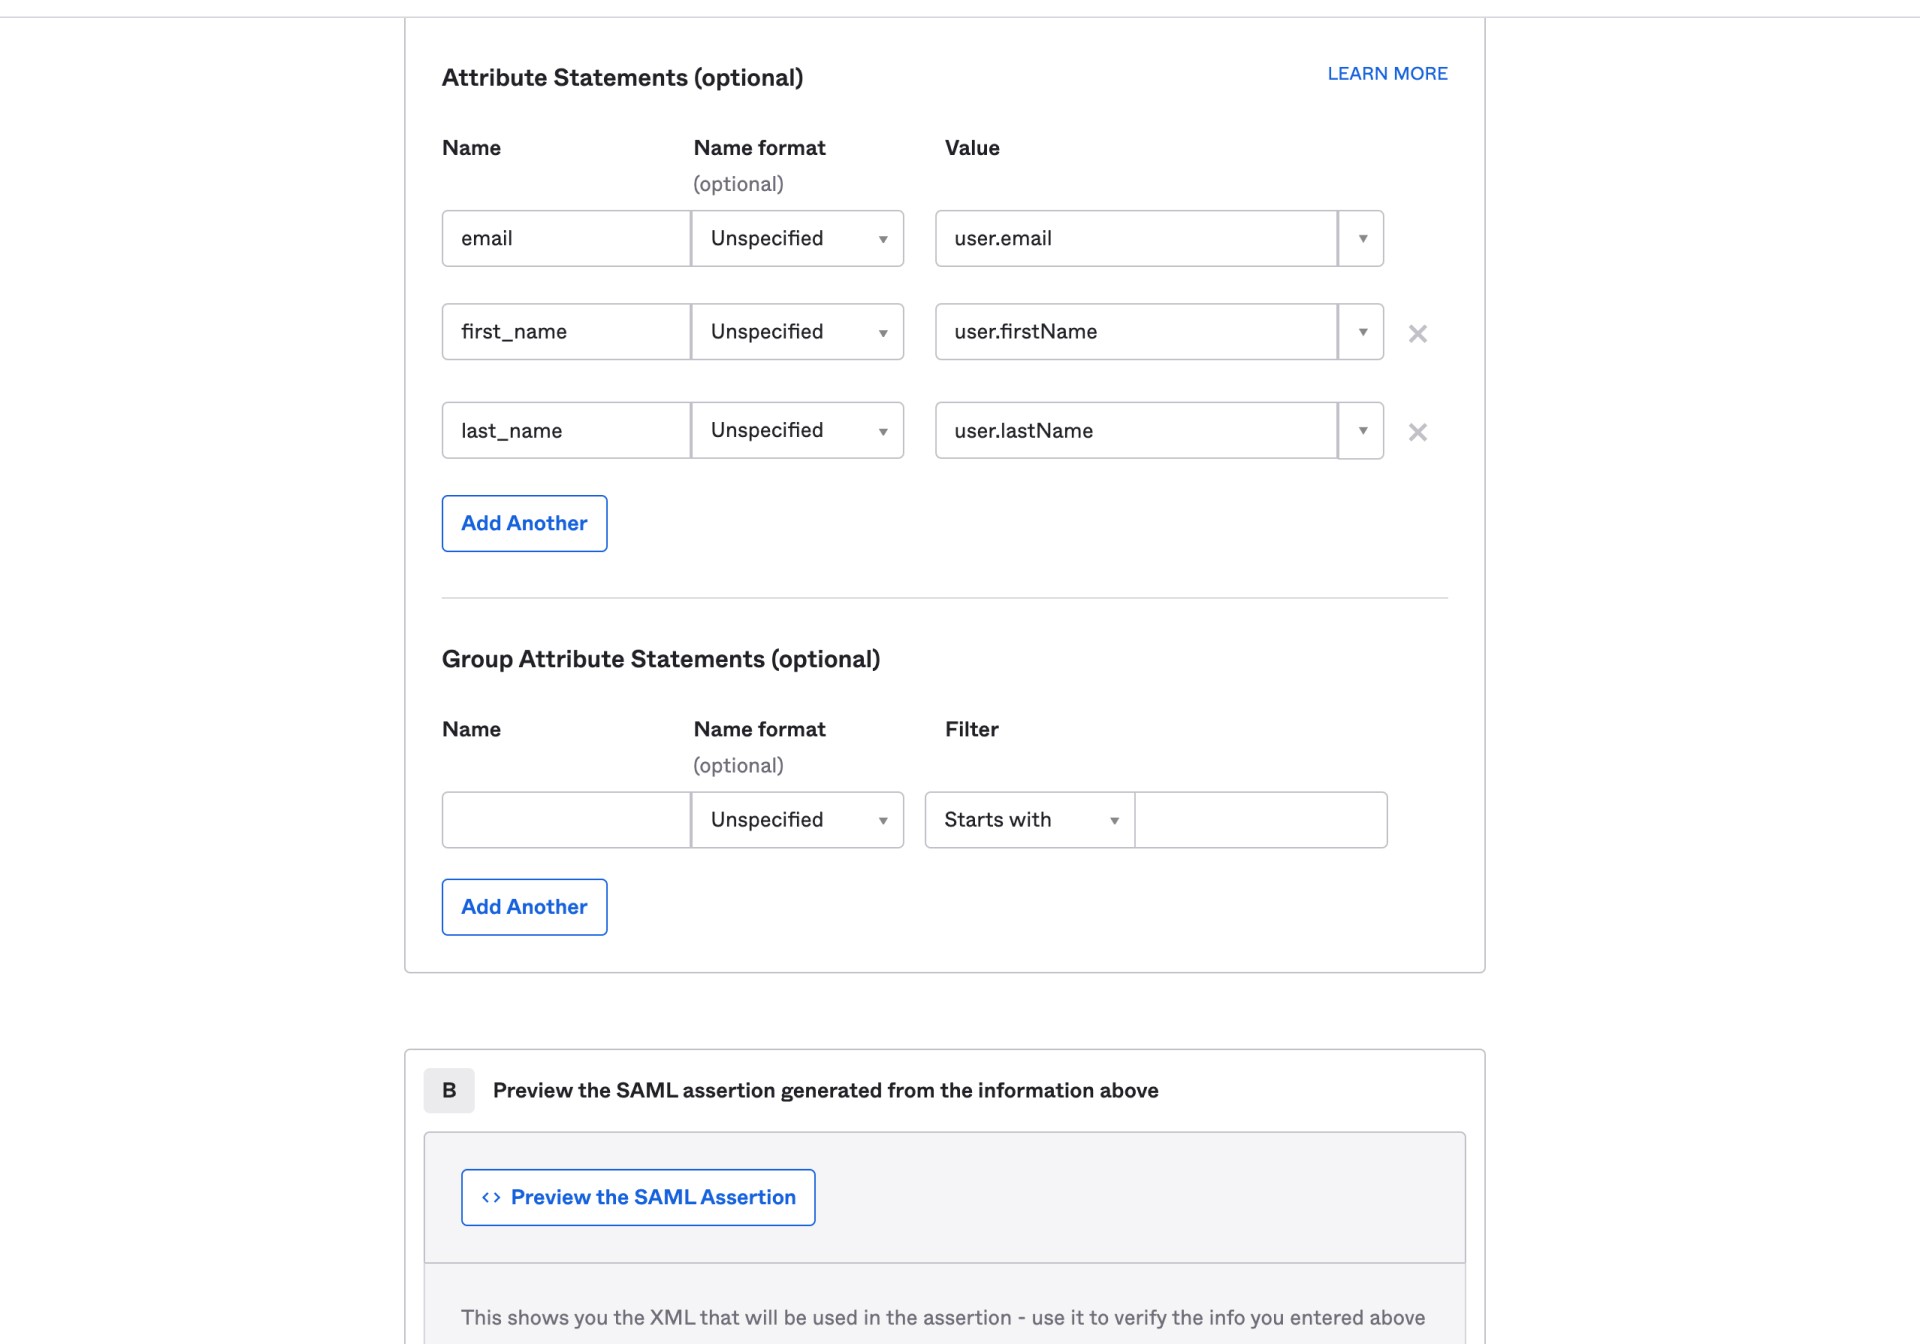
Attribute Statements (case sensitive)
Add the following attributes:
email →
user.emailfirst_name →
user.firstNamelast_name →
user.lastName
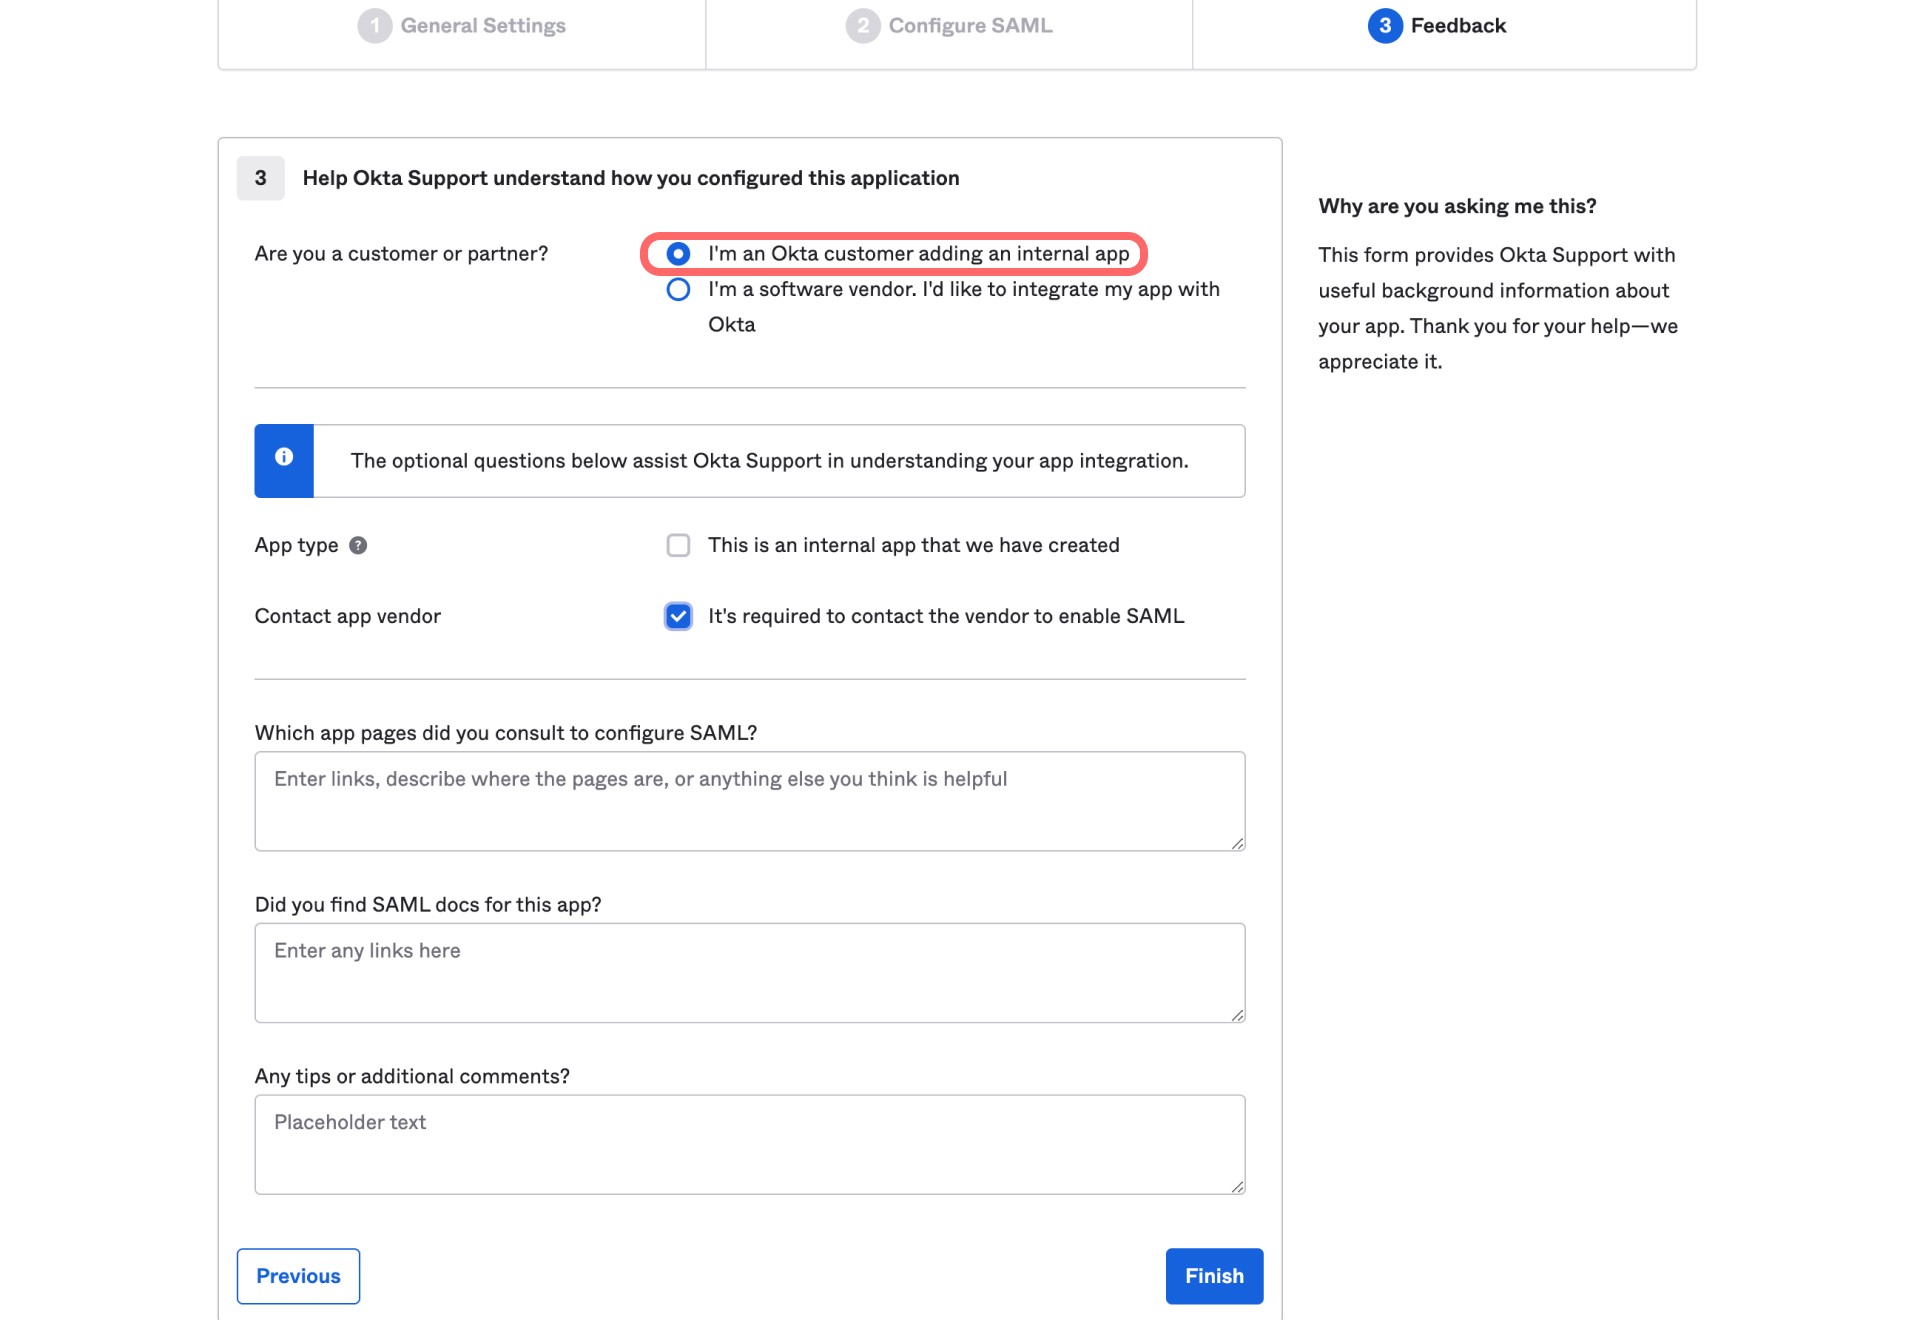
Click Next.
Select:
I'm an Okta customer adding an internal app
Click Finish.
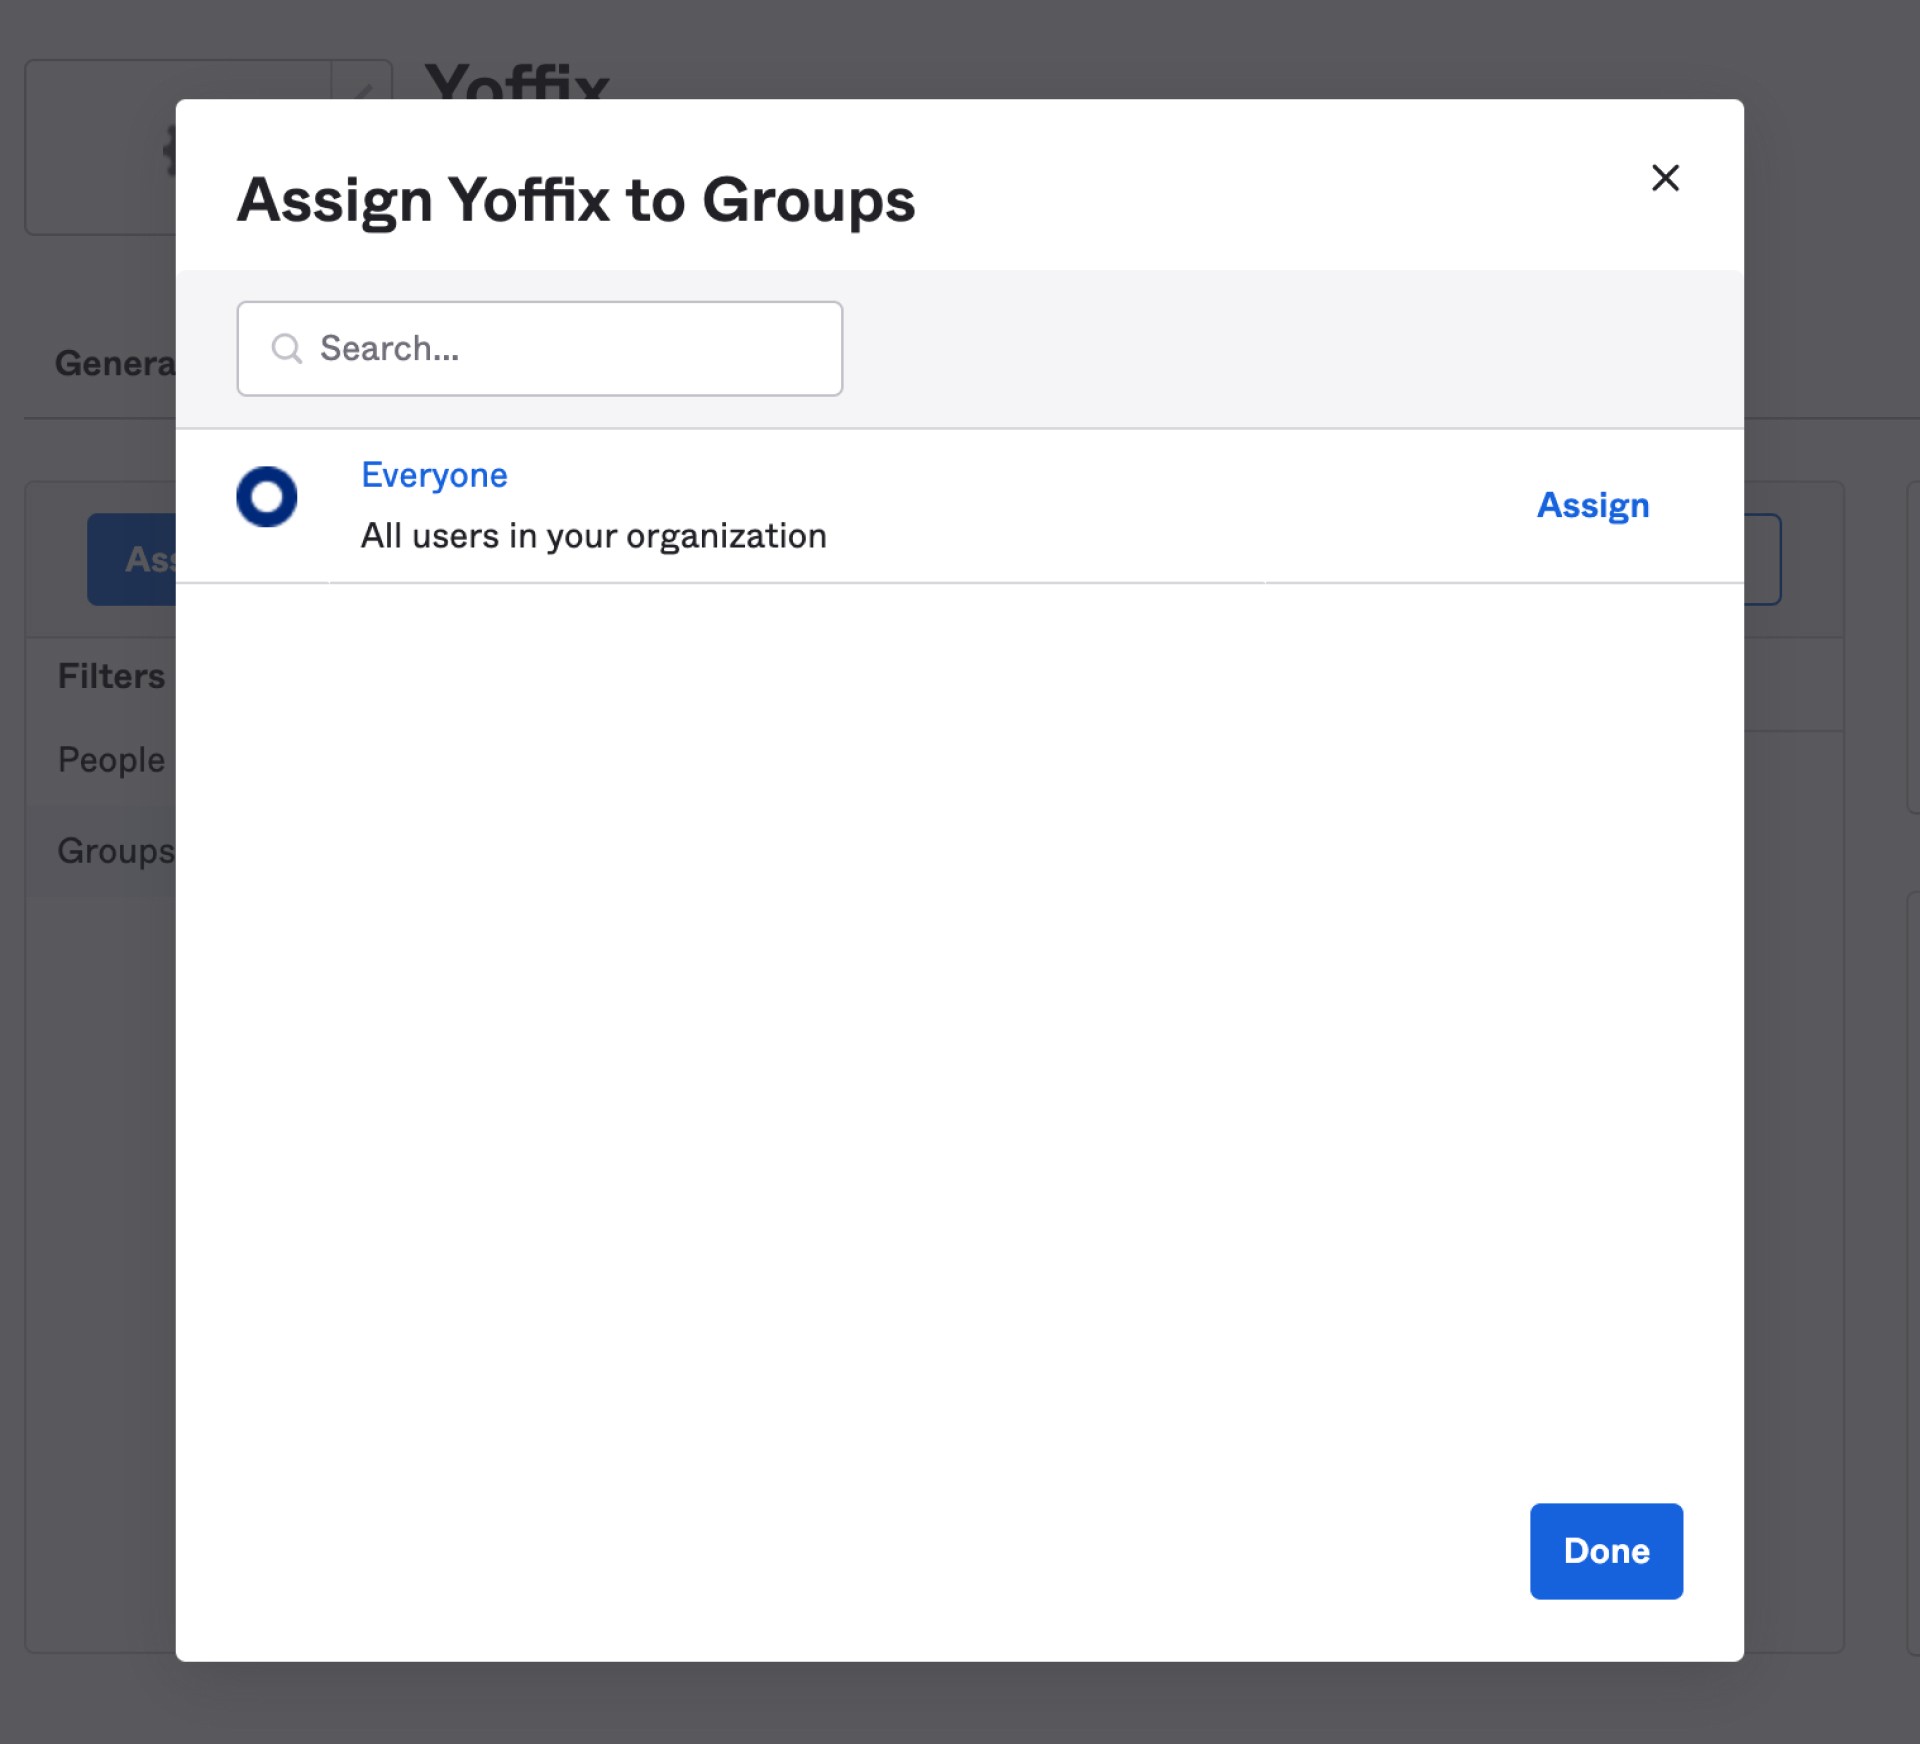
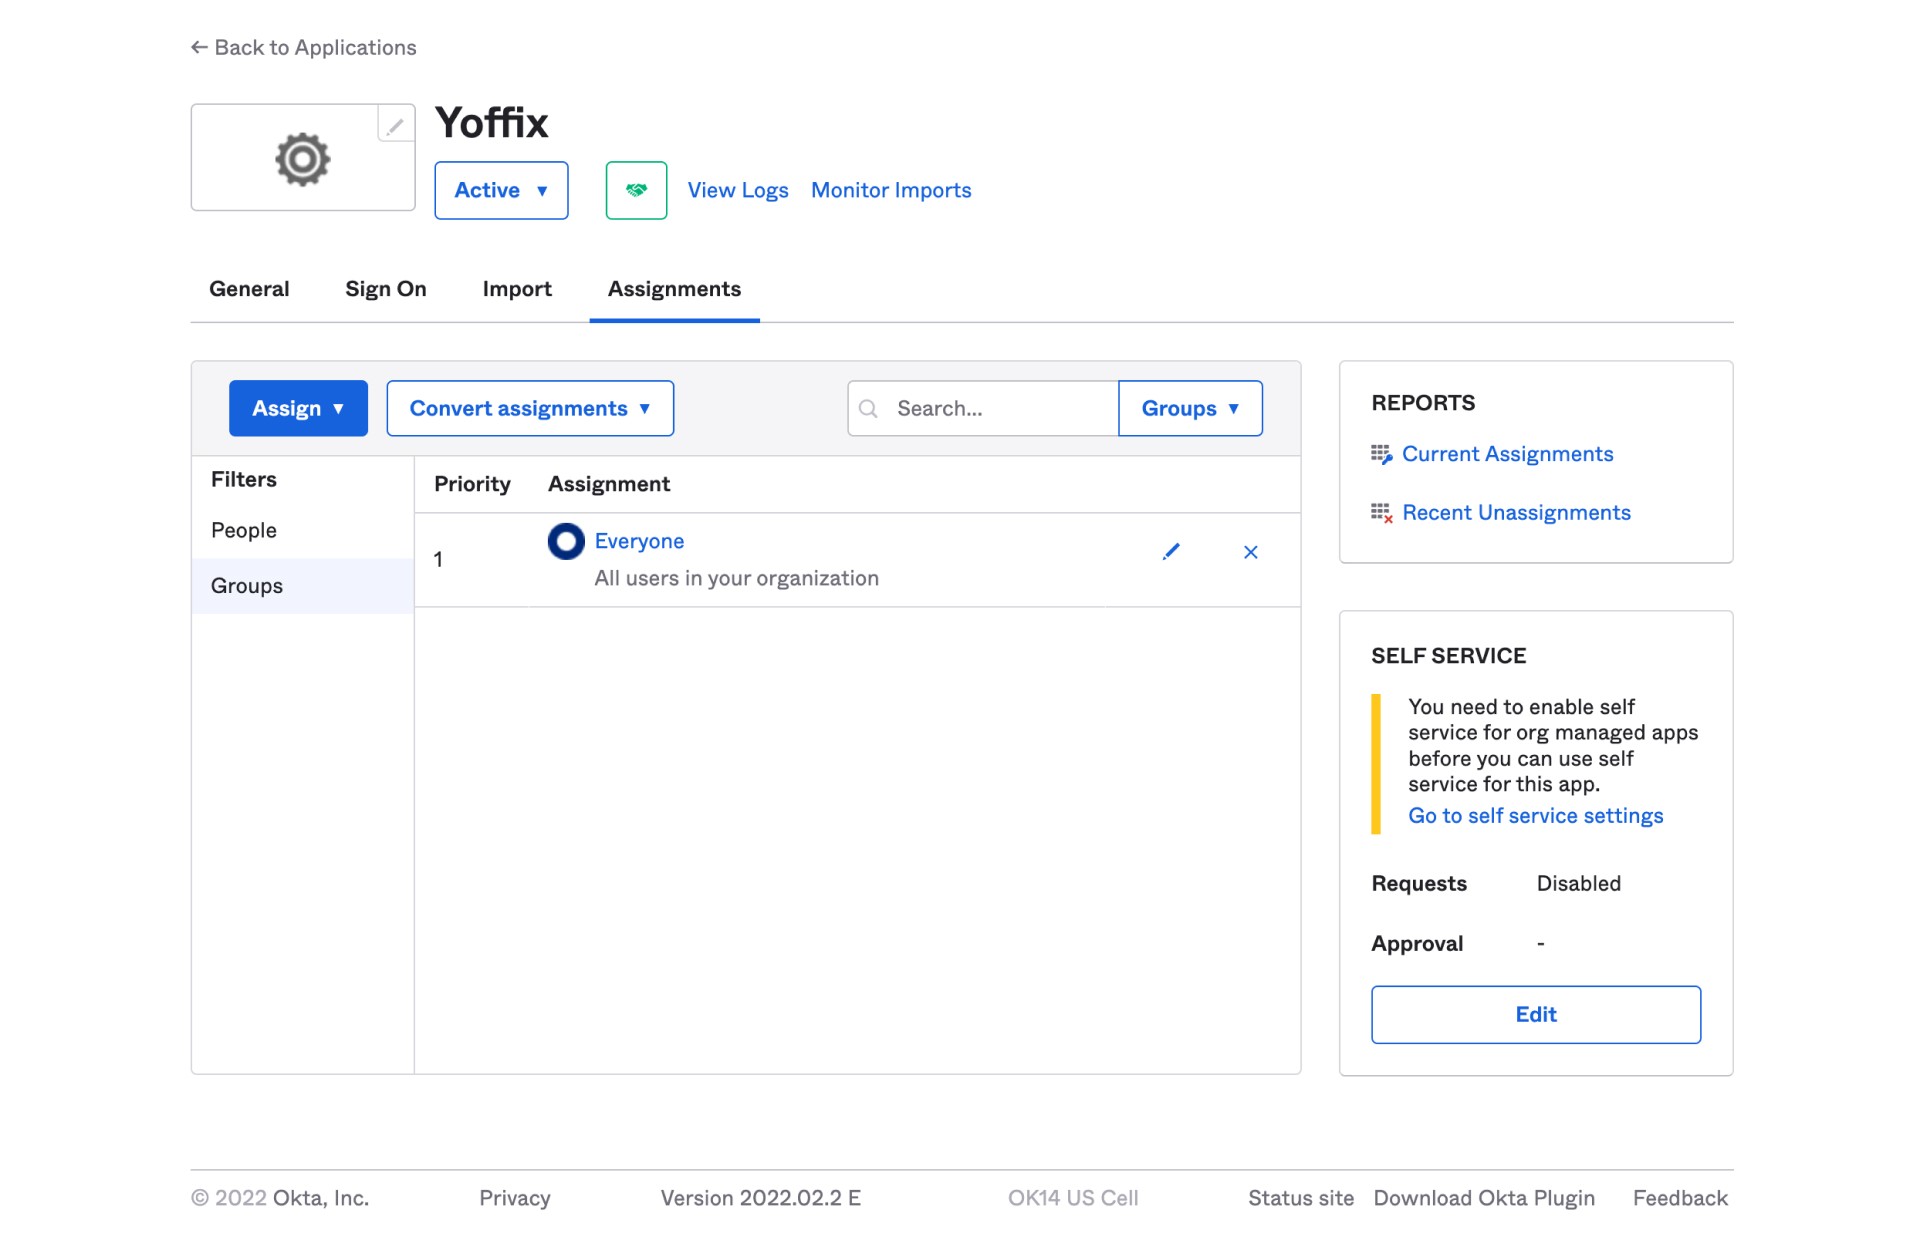
Step 4: Assign Users or Groups
Open the Assignments tab inside the Yoffix application.
Assign users or groups who should access Yoffix via Okta SSO.
Only assigned users will be able to authenticate through Okta.
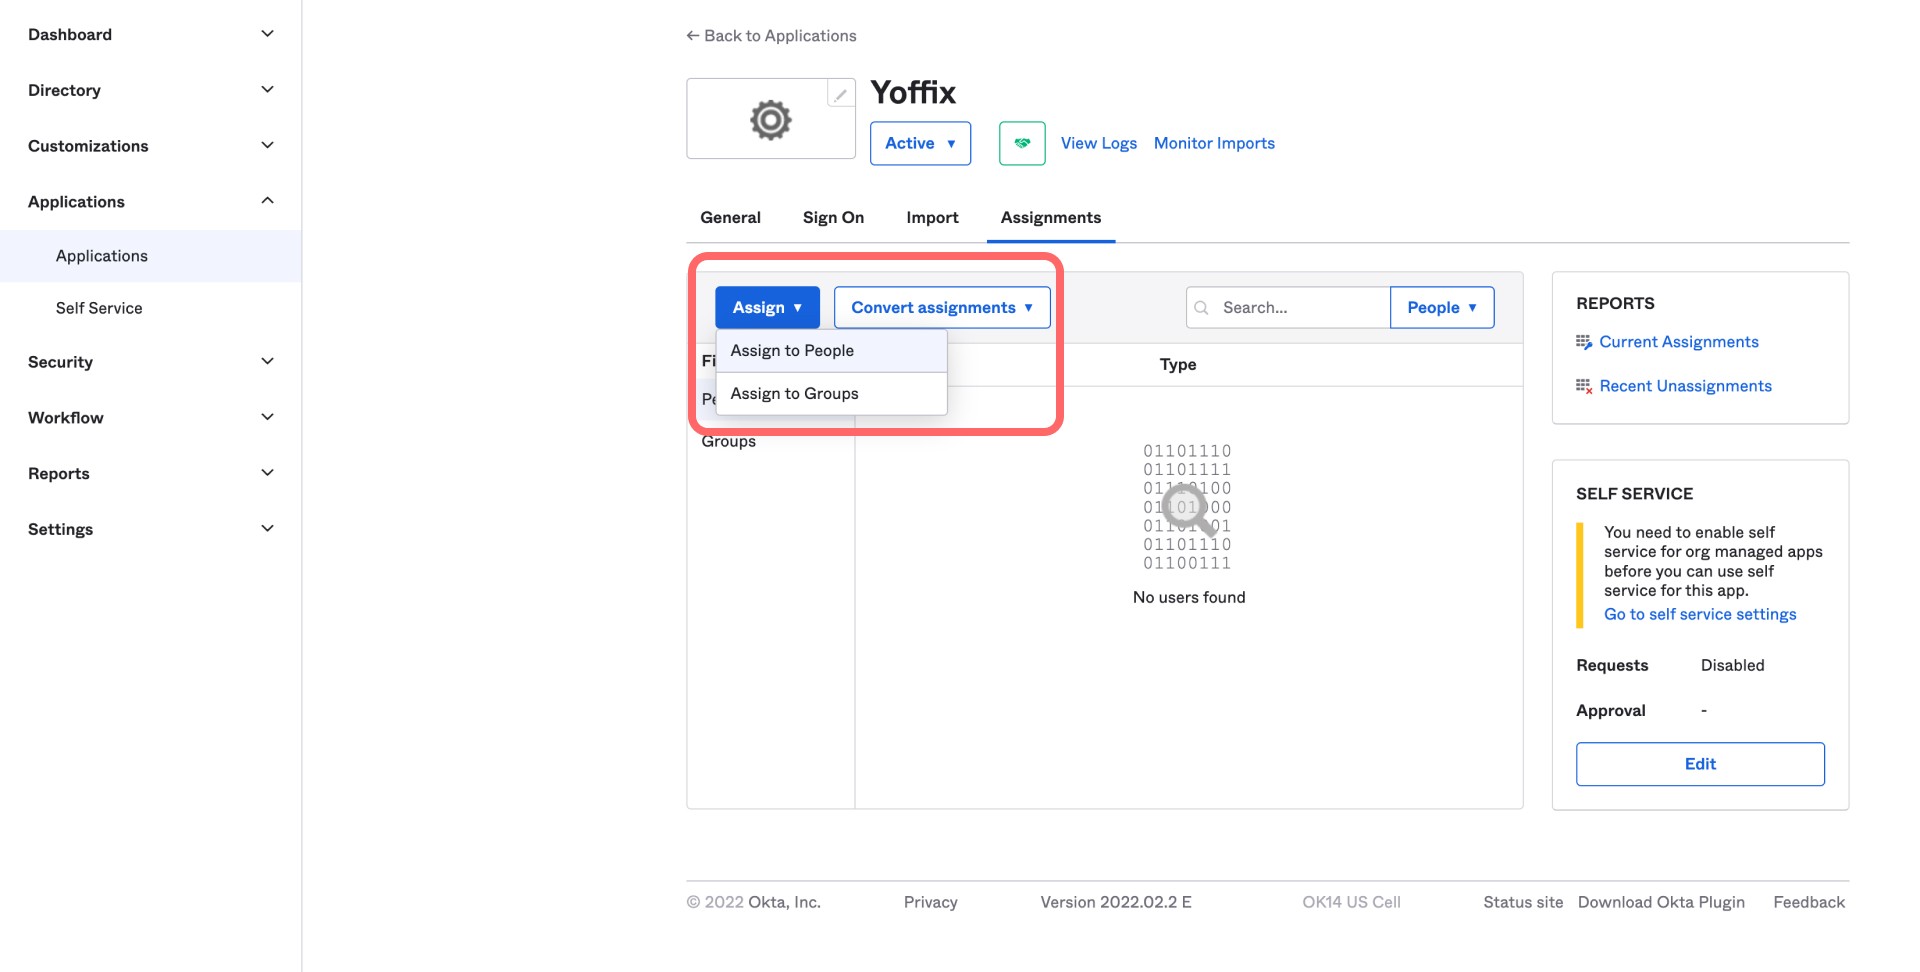
For example you can assign everyone from your Organisation.
Configure Okta SSO in Yoffix
After completing the Okta setup:
Go to Settings → SSO in Yoffix.
Select SAML.
Enter the following details from Okta:
SSO URL
(Identity Provider Single Sign-On URL from Okta)X.509 Certificate
You can define up to 10 allowed email domains.
Example:
If your company emails follow the format name@yourorgdomain.com, add:
yourorgdomain.com
Only users with configured domains will be able to authenticate via Okta SSO.
If you're still experiencing issues, contact Yoffix support at support@yoffix.com — our team will assist you.