The Smart Desk Booking and Workplace Management Platform for HiBob Users
If your HR team already runs on HiBob, Yoffix is the missing layer between your HR data and your physical workplace. The native HiBob–Yoffix integration automatically syncs employee profiles, team structures, and absence statuses so your desk sharing, parking management, and hybrid attendance always reflect real HR data. No manual updates, no double data entry, and no wasted desks.
What the HiBob Integration Does
Once connected, Yoffix will:
Import employee profiles (name, email, department, position) from HiBob automatically
Sync absence statuses in real time via webhooks so vacation, sick leave, and other time-off types are reflected immediately in desk booking and attendance views
Handle employee lifecycle events including new hires, updates, and terminations as they happen in HiBob
Optionally sync profile pictures from HiBob to Yoffix employee profiles
How to Connect HiBob with Yoffix
Setup has six steps and requires admin access in both HiBob and Yoffix. No IT involvement or coding is needed.
Step 1: Create a service user in HiBob
Log in to HiBob as an administrator.
Open Settings and go to Integration tools > Service Users.
Click to create a new service user and name it Yoffix integration.
Save the service user.
Copy the generated Service User ID and Service User Token.
Keep these credentials somewhere safe before leaving the page. HiBob only shows the service user token when it is first created or regenerated. If you lose it, you will need to regenerate a new token.

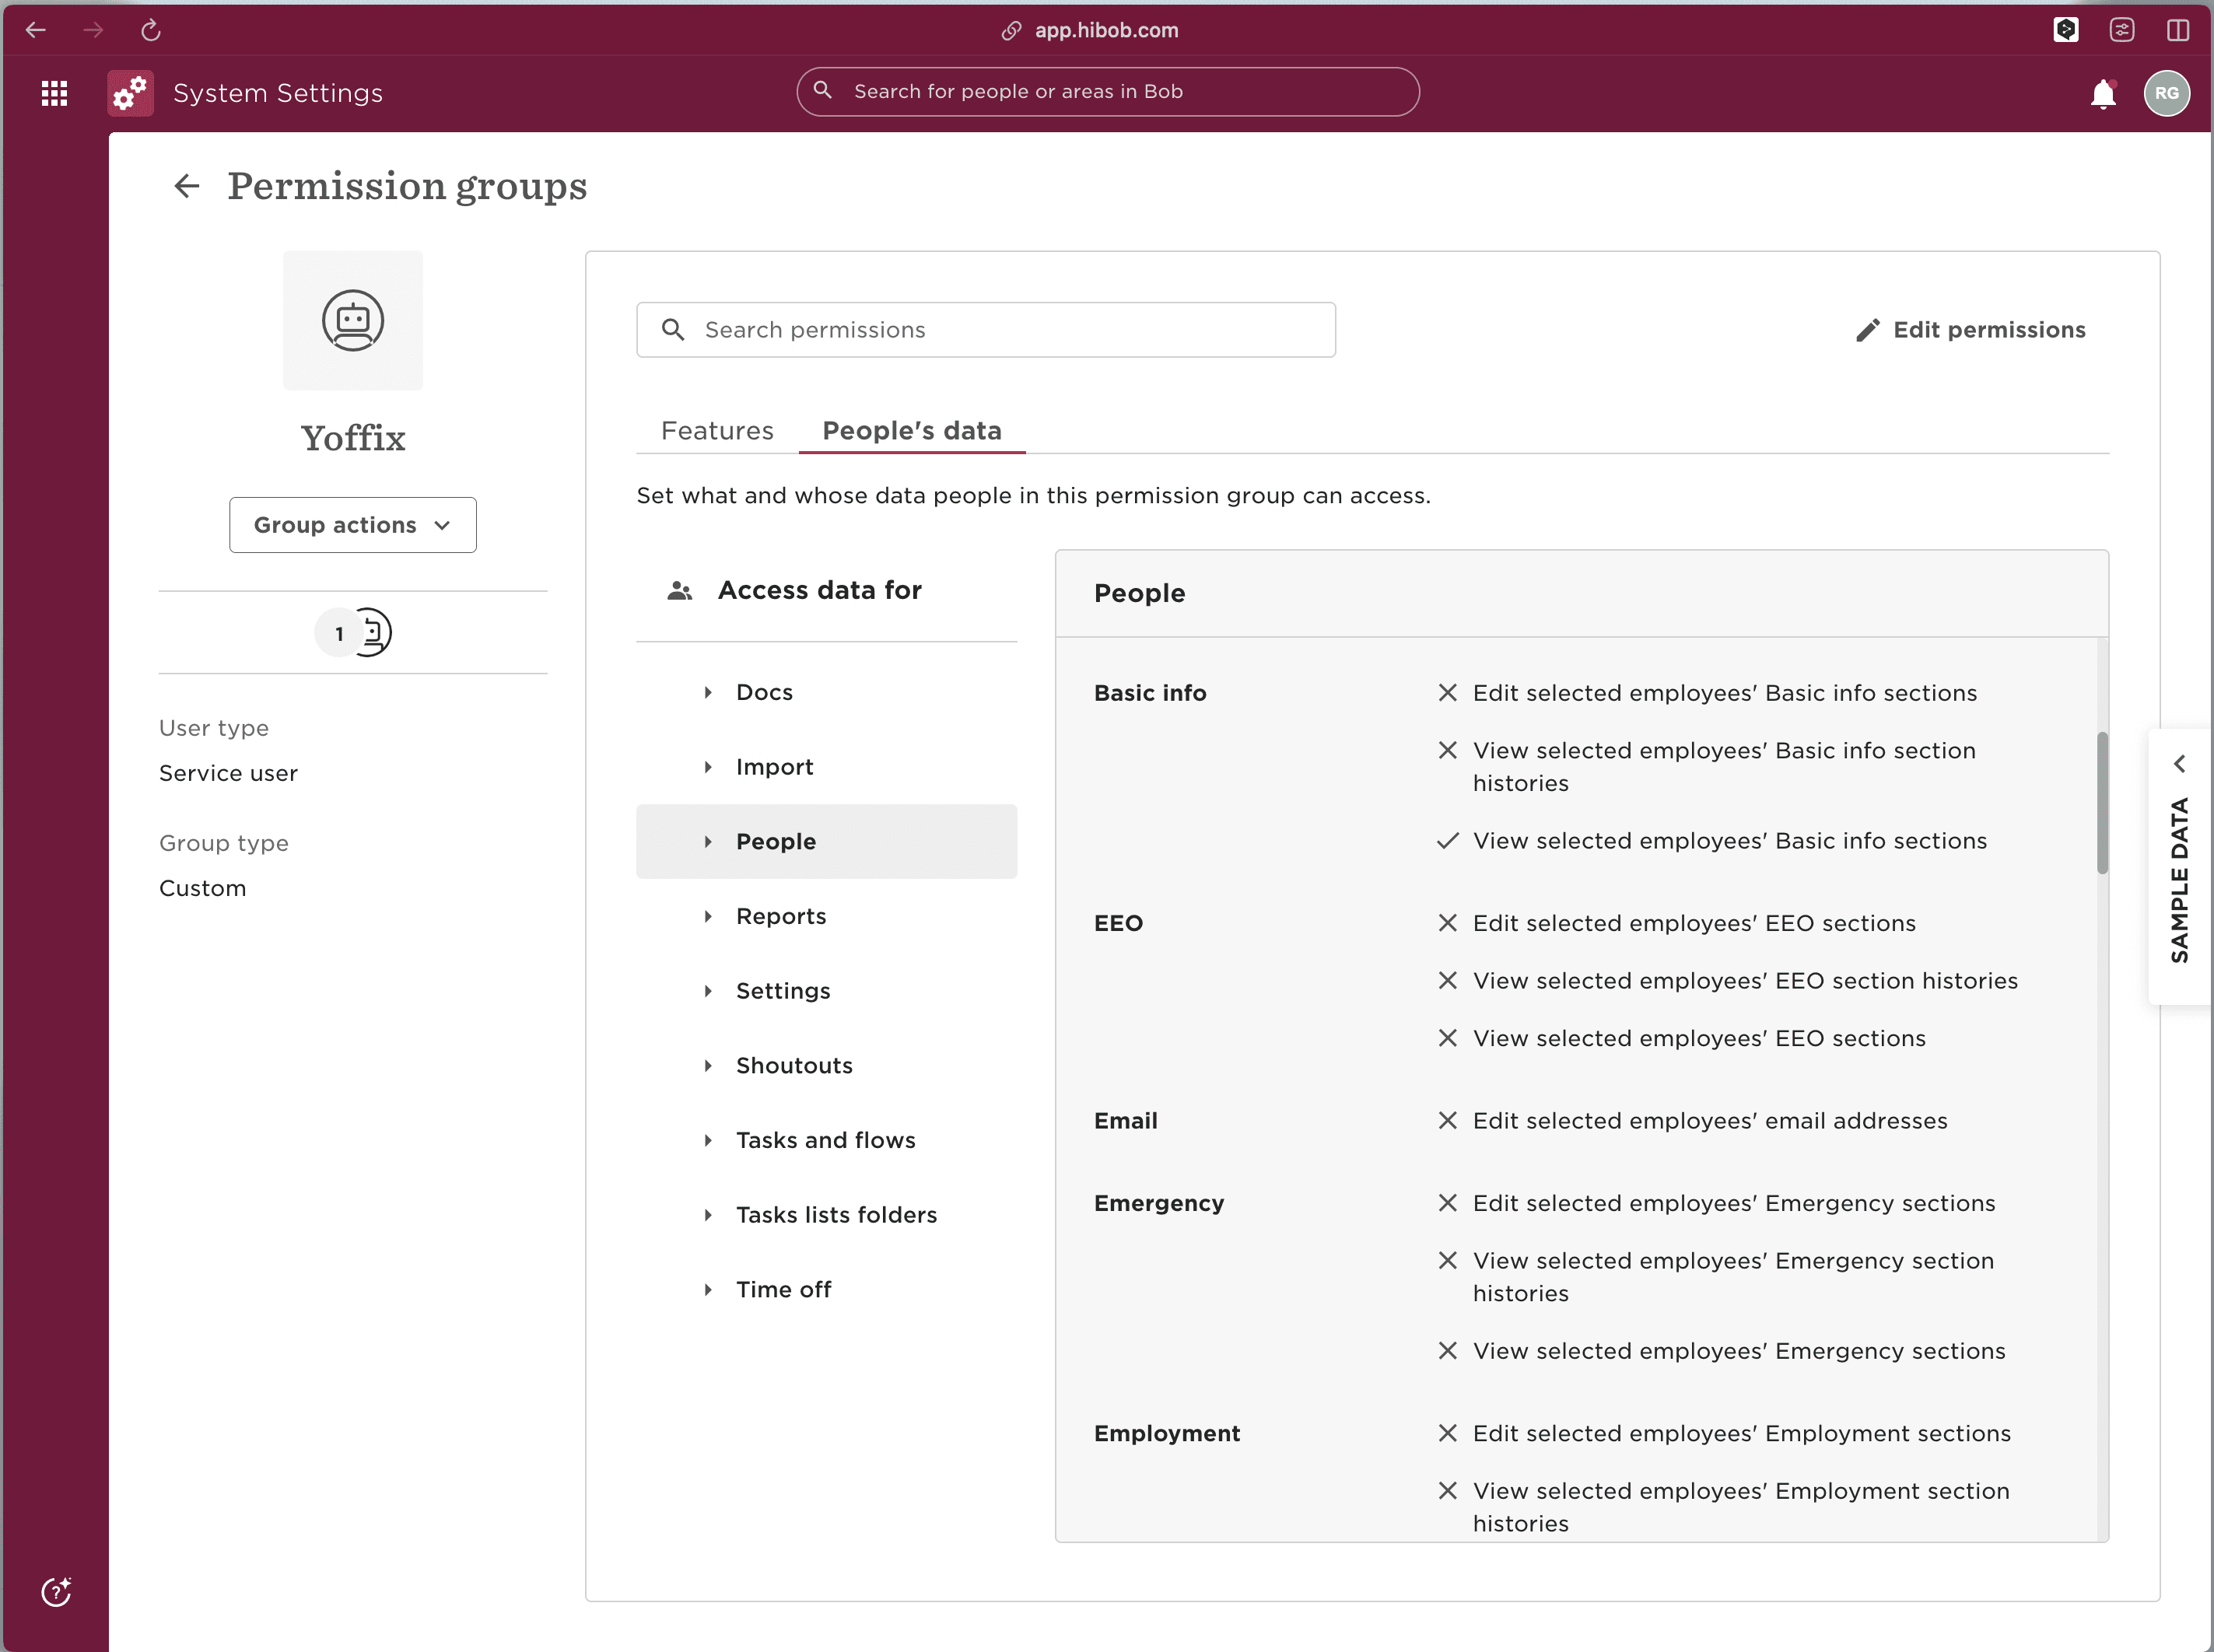
Step 2: Create a permission group
In Settings, go to Account > Permission groups.
Create a new permission group and name it Yoffix integration.
Add the service user you created in Step 1 to this group.
Save the group.
Step 3: Grant employee data permissions
Open the Yoffix integration permission group and grant view access to the following:
Basic employee fields: employee ID, first name, last name, display name, and email
Work fields: employee ID or payroll ID if used
Lifecycle or internal status fields, so inactive or terminated users are handled correctly
Profile image or avatar fields if you want profile pictures to sync to Yoffix (optional)
Step 4: Choose the employee population and grant time off permissions
Employee population: In the permission group, open the employee data access settings and choose which employees should be included. For a full company sync, allow access to all employees. If inactive or terminated employees should be processed, make sure the access rule is not limited to currently employed users only.
Time off permissions: In the same permission group, grant read access to:
Time off requests
Who is out or out-of-office data
Time off policy types
Employee identifiers attached to time off records
Yoffix imports approved absences and syncs changes each time HiBob sends a webhook update.
Step 5: Enter credentials in Yoffix
In Yoffix, go to Company settings > Integrations > User Sync > HiBob.
Enter the Service User ID and Service User Token from Step 1.
Click Connect.
Copy the HiBob webhook callback URL shown by Yoffix. You will need this in the next step.
Step 6: Set up Webhooks V2 in HiBob
In HiBob, go to Settings > Integrations (or Automation) > Webhooks.
Add a new webhook and select Webhooks V2.
Paste the webhook callback URL you copied from Yoffix.
Select the following event types and save:
employee.created
employee.updated
employee.deleted
employee.terminated
timeoff.request.created
timeoff.request.updated
timeoff.request.deleted
If HiBob only allows one event type per webhook, create one webhook for each event type and reuse the same Yoffix callback URL for all of them.
Step 7: Verify the integration
Once webhooks are active, confirm that the following are working as expected:
Employees from HiBob appear or update in Yoffix
Approved HiBob absences appear as unavailable bookings in Yoffix
New or changed employees sync after webhook events
New, changed, or deleted absences sync after webhook events
What Data Is Synced
Employee data:
Name and email address
Department and team
Position
Profile photo (if permission is granted in Step 3)
Absence data:
All approved time off requests (vacation, sick leave, and other time-off types)
Out-of-office statuses
Changes and cancellations to existing time off requests
Why Connect HiBob with Yoffix?
No wasted desks. Absent employees are automatically removed from the booking pool.
Automated onboarding. New hires appear in Yoffix the moment they are added in HiBob.
No manual attendance adjustments. Absence data flows through without admin intervention.
GDPR-compliant. All data is processed and stored within the EU. The integration is ISO 27001-aligned.
Troubleshooting
The integration cannot be enabled after entering credentials. Verify that the Service User ID and token were copied correctly and that the service user is assigned to the Yoffix integration permission group.
Employees are not appearing or updating in Yoffix. Check that the permission group has the required employee data access and that the employee population setting is not restricted to currently employed users only, if you need terminated users to be handled.
Absences are not reflecting in Yoffix. Confirm that the permission group has read access to time off requests, who is out data, time off policy types, and employee identifiers. Also verify that webhooks were created as Webhooks V2 and that all seven required event types are included.
Webhooks are not triggering. Make sure you used the Webhooks V2 option in HiBob and that the Yoffix callback URL was pasted correctly. If HiBob limits you to one event type per webhook, create a separate webhook for each of the seven event types and reuse the same callback URL.
Need help? Contact us at support@yoffix.com. Our team typically responds within one business day.
Frequently Asked Questions
Does HiBob integrate with desk booking software?
Yes. Yoffix integrates natively with HiBob and supports automated desk sharing, room booking, absence-based availability, and hybrid attendance management, all driven by your HiBob HR data in real time.
What data syncs between HiBob and Yoffix?
Yoffix automatically imports employee profiles, team structures, and absence data from HiBob. New employees added in HiBob are provisioned in Yoffix without any manual step.
How long does it take to set up the HiBob–Yoffix integration?
Setup takes a few minutes. Generate API credentials in HiBob, paste them into Yoffix, and your data starts syncing immediately. No IT work or custom configuration is required.
Is the HiBob–Yoffix integration GDPR-compliant?
Yes. The integration uses HiBob's official API, transfers data over encrypted connections, and stores all data within the EU. Yoffix is ISO 27001-aligned and fully GDPR-compliant.
What happens when a new employee is added in HiBob?
New employees are automatically provisioned in Yoffix. They receive an invitation to activate their Yoffix account and can immediately start booking desks and rooms.