How to set up Single Sign-On (SSO) with Microsoft Entra ID in Yoffix
The following instructions describe how to configure SAML 2.0 SSO using Microsoft Entra ID (formerly Azure Active Directory).
For other supported SSO providers please see the dedicated pages
Step 1: Log in to Microsoft Entra ID
Go to: https://portal.azure.com
Navigate to: Microsoft Entra ID → Enterprise applications.
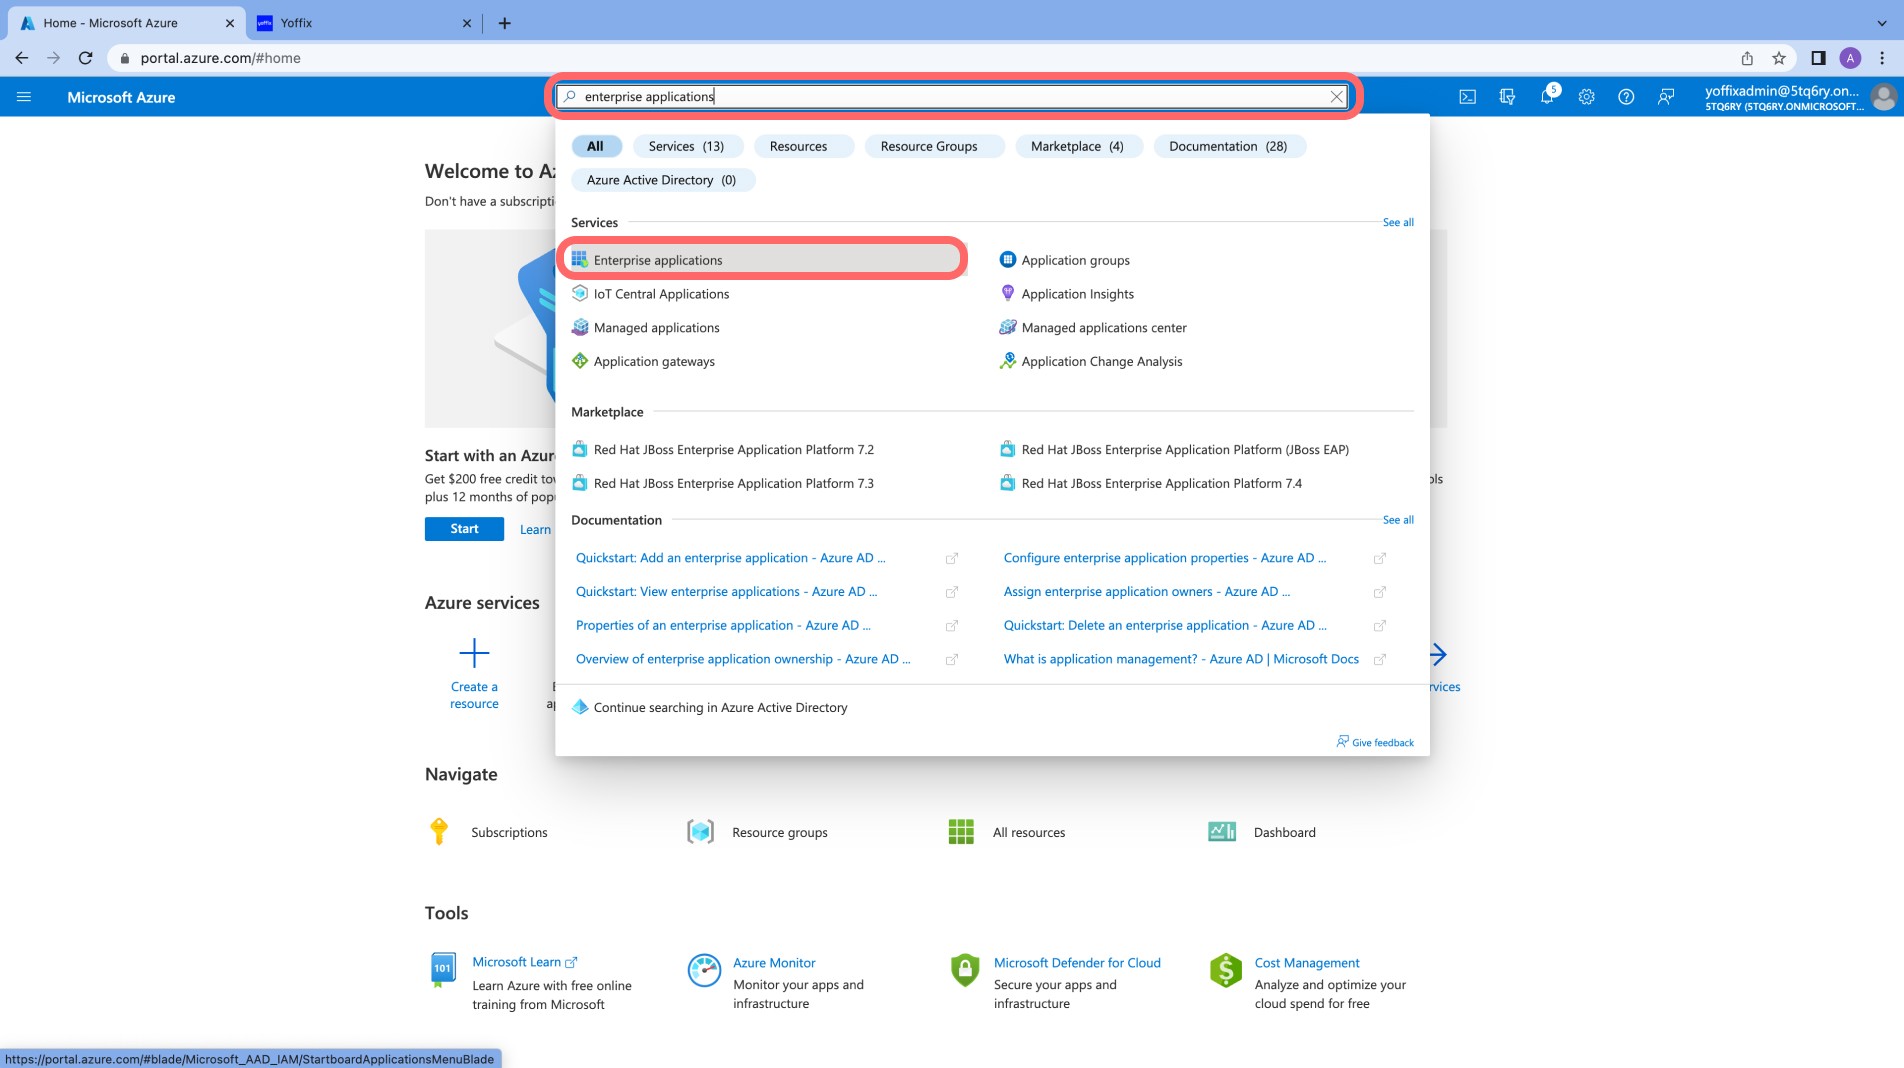
Step 2: Create a SAML 2.0 Application
Click New application

Click Create your own application
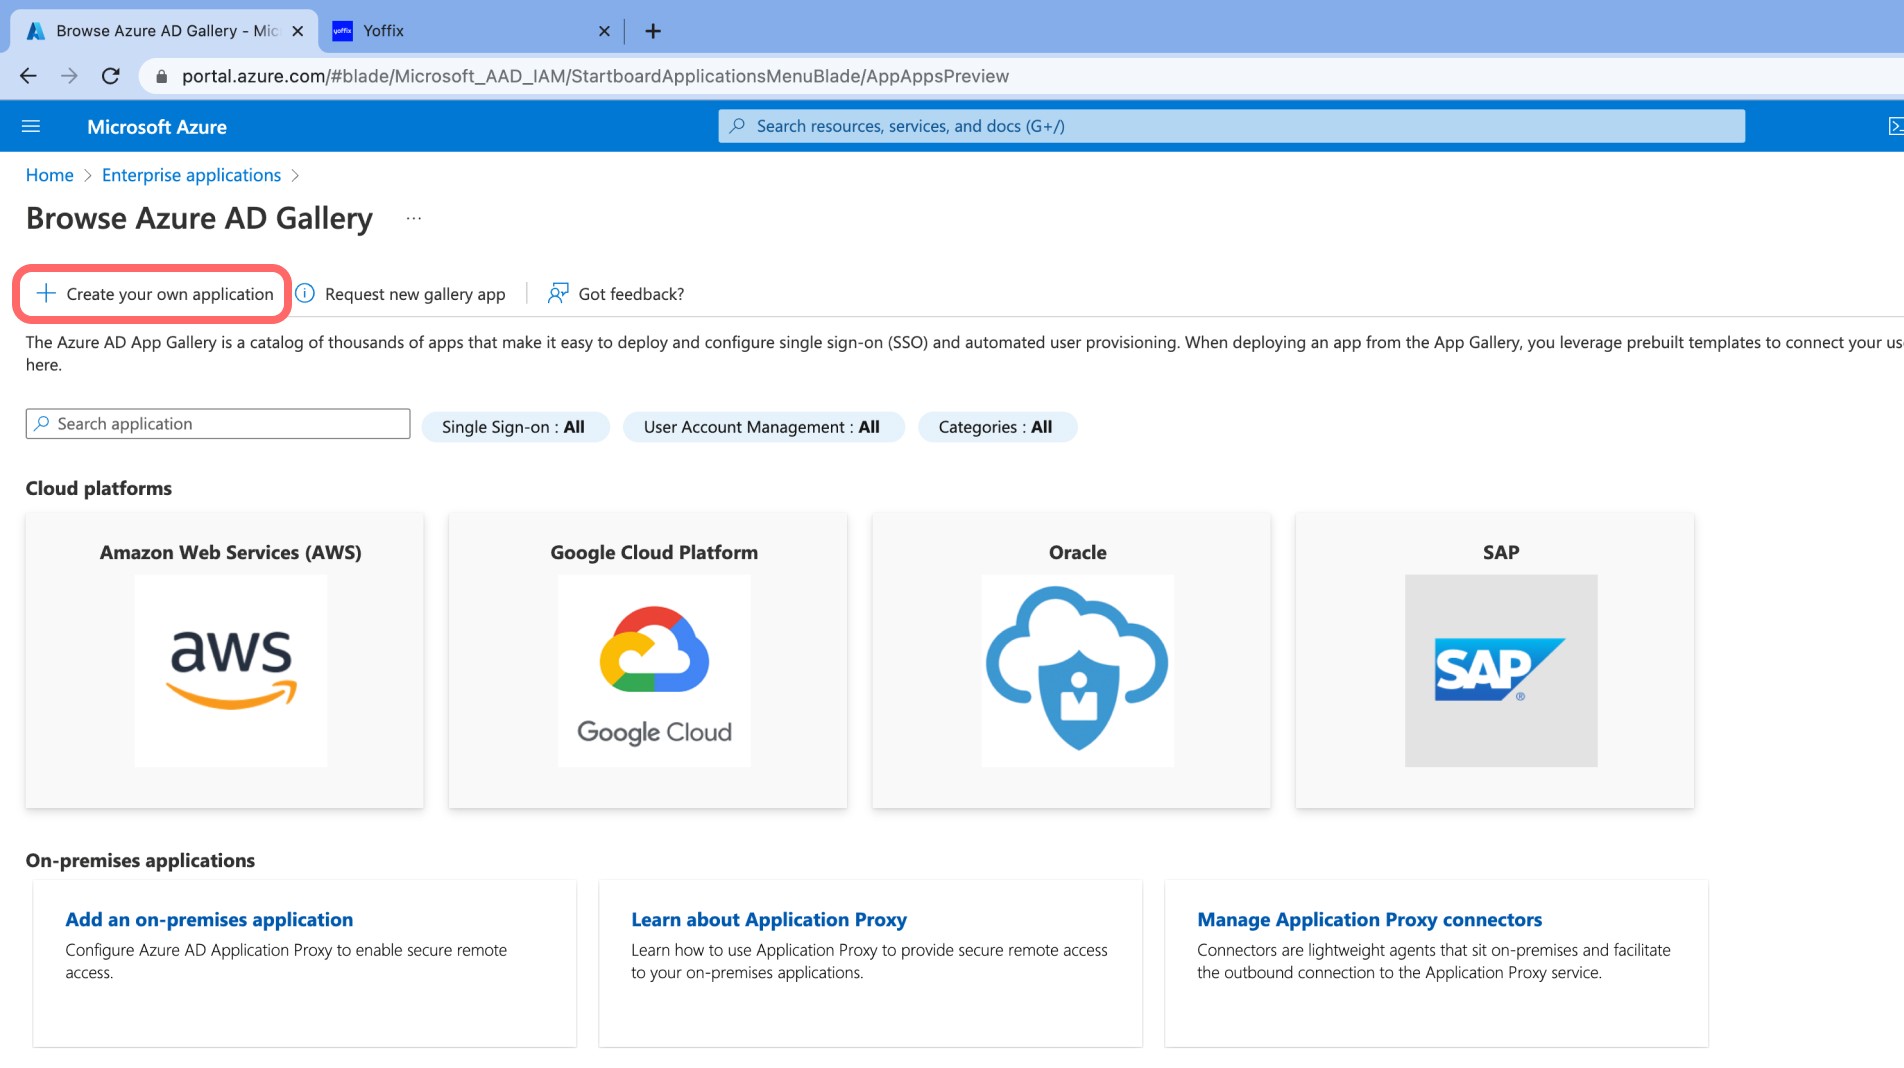
Enter Yoffix as the name
Select: Integrate any other application you don't find in the gallery (Non-gallery)
Click Create

Step 3: Configure Single Sign-On
Open the application
Go to Single sign-on
Select SAML

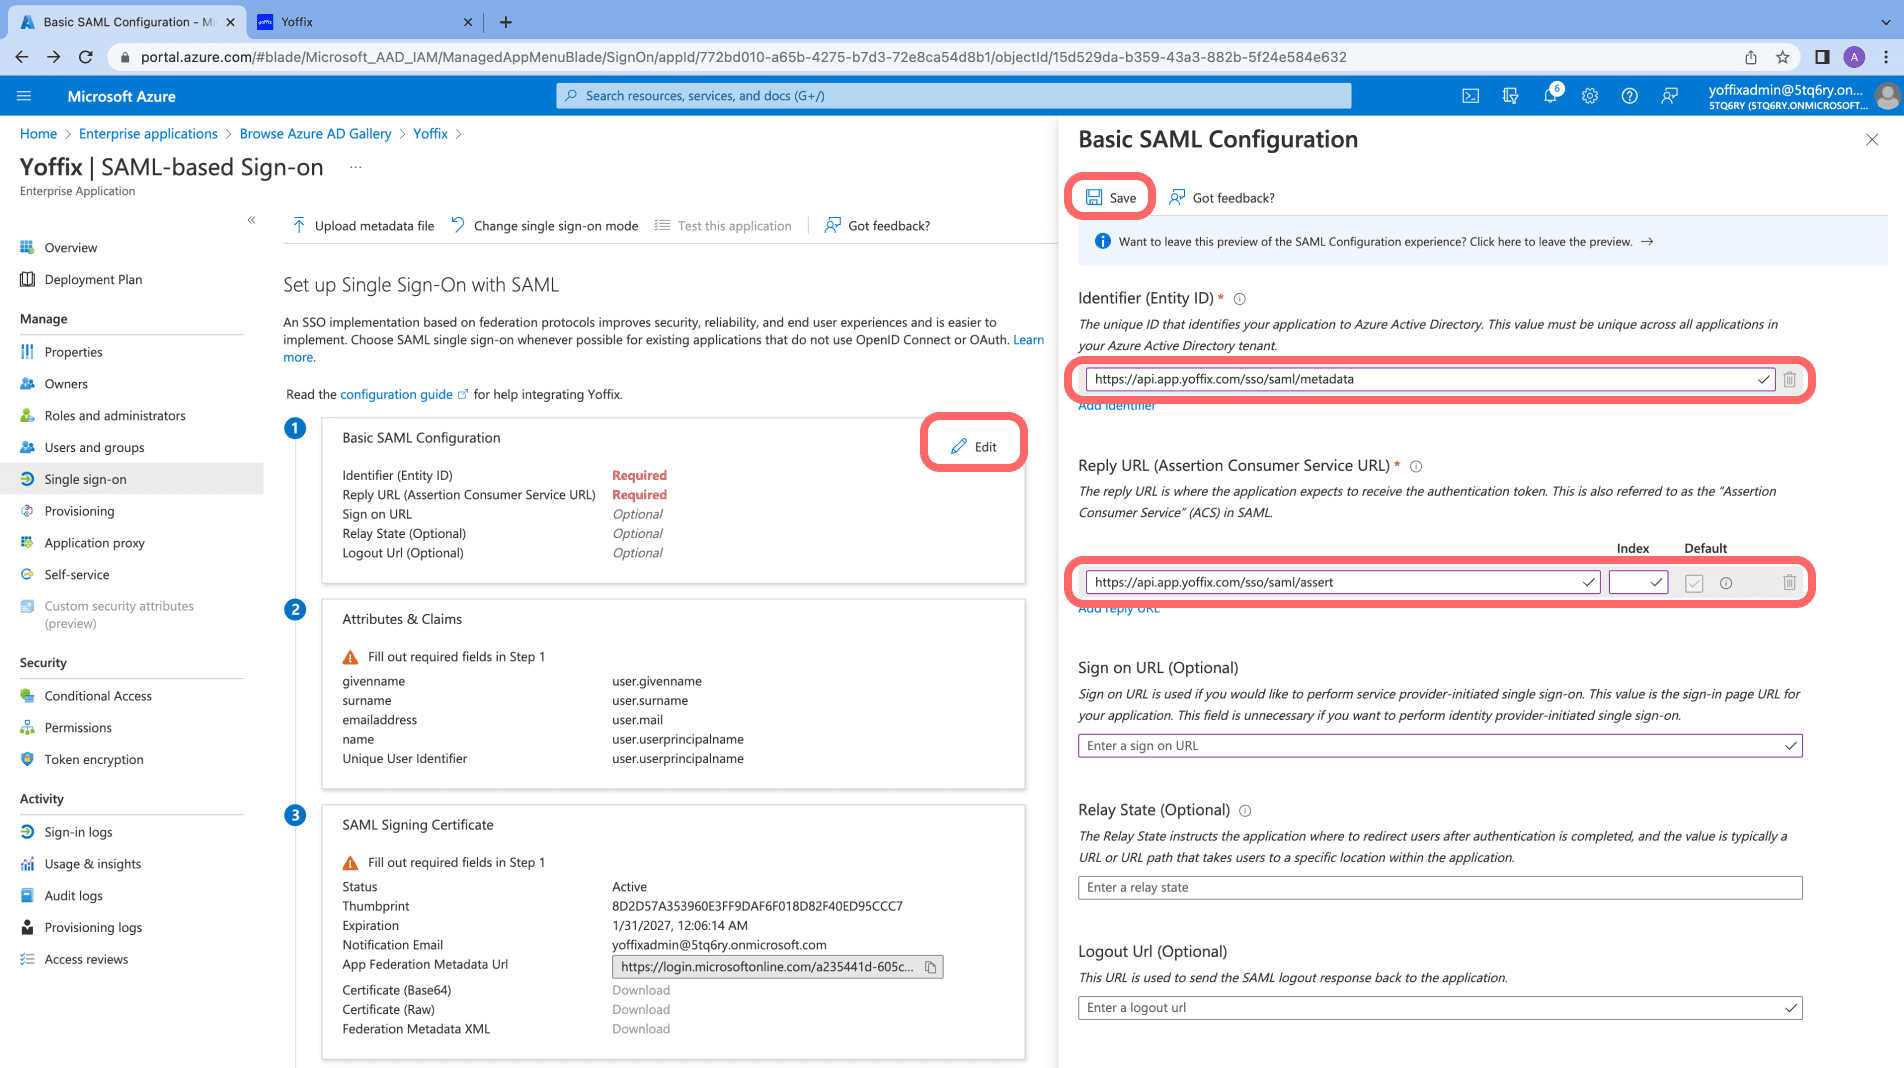
In the Basic SAML Configuration section, click Edit and enter:
Identifier (Entity ID):
https://api.app.yoffix.com/sso/saml/metadataReply URL (Assertion Consumer Service URL):
https://api.app.yoffix.com/sso/saml/assert
Leave all other fields blank.
Click Save.
Step 4: Configure Attributes & Claims
Click Edit Attributes & Claims.
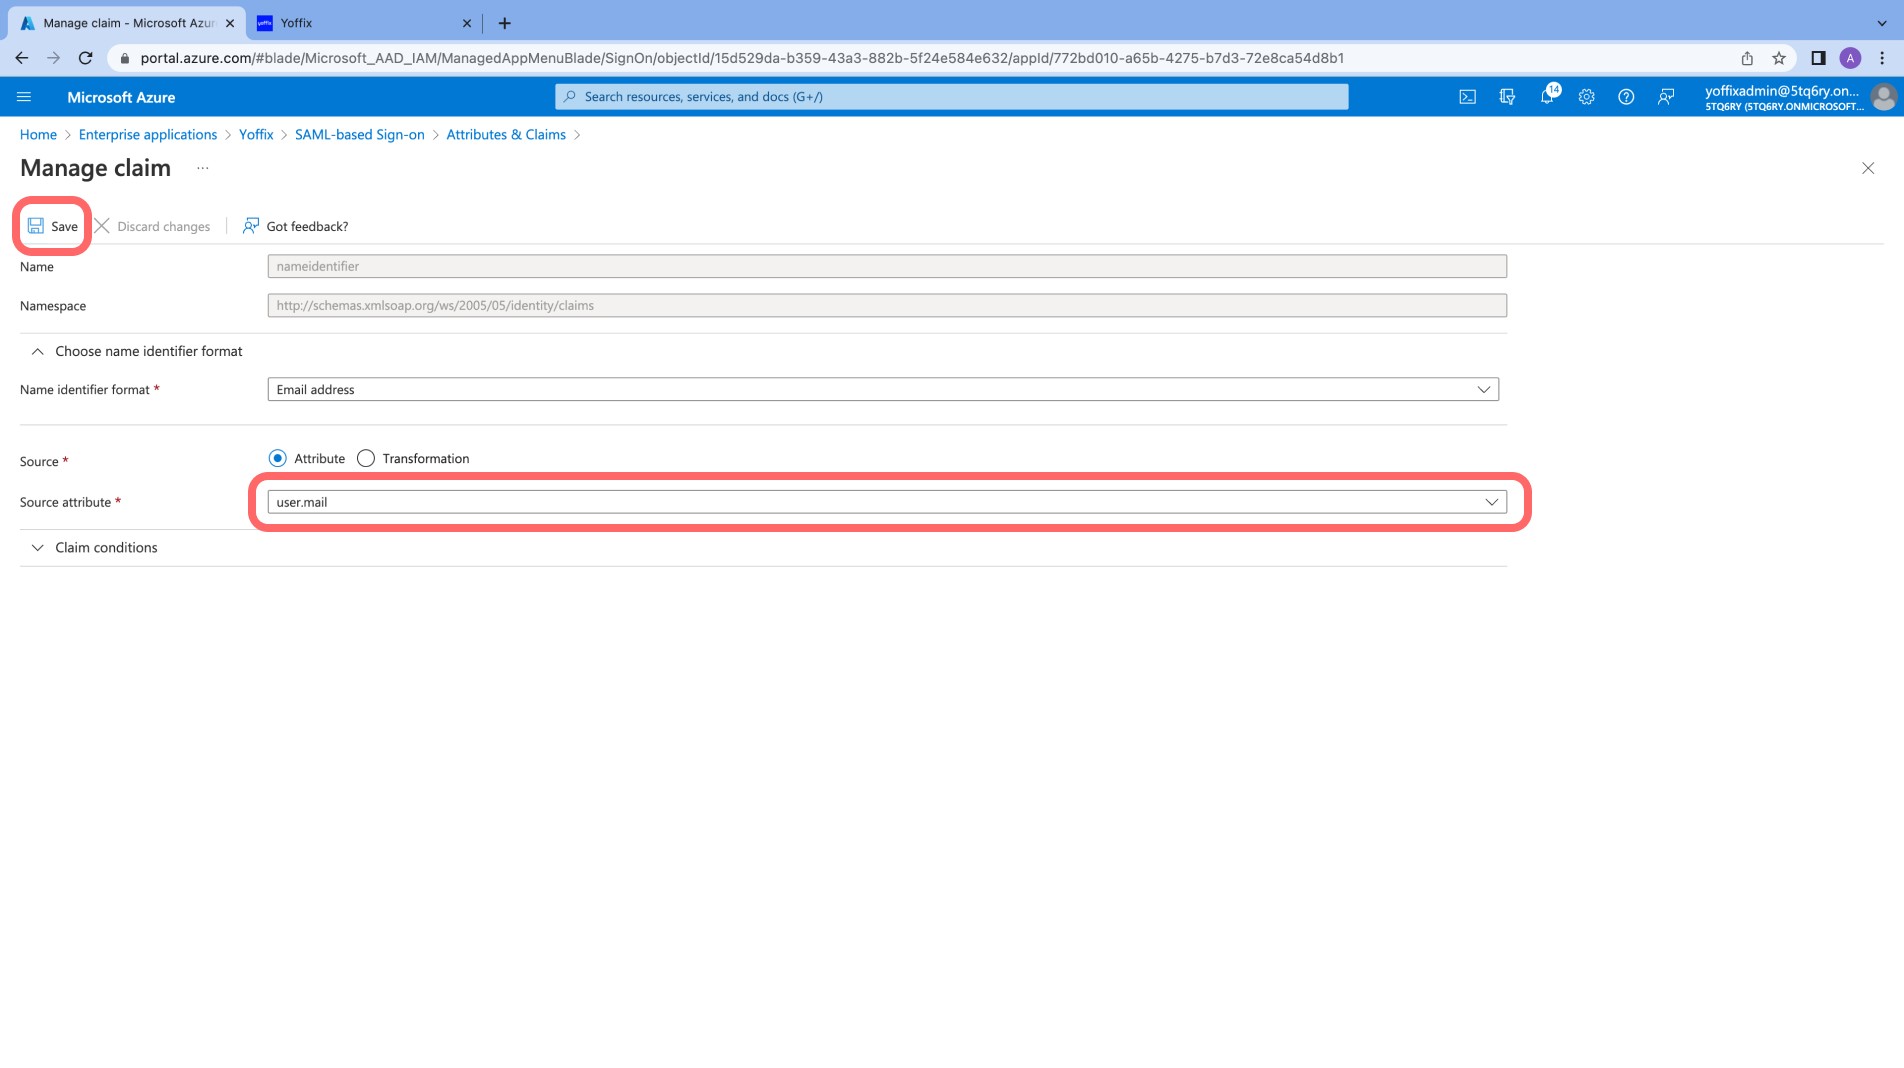
Modify Required Claim
Open Unique User Identifier (Name ID)
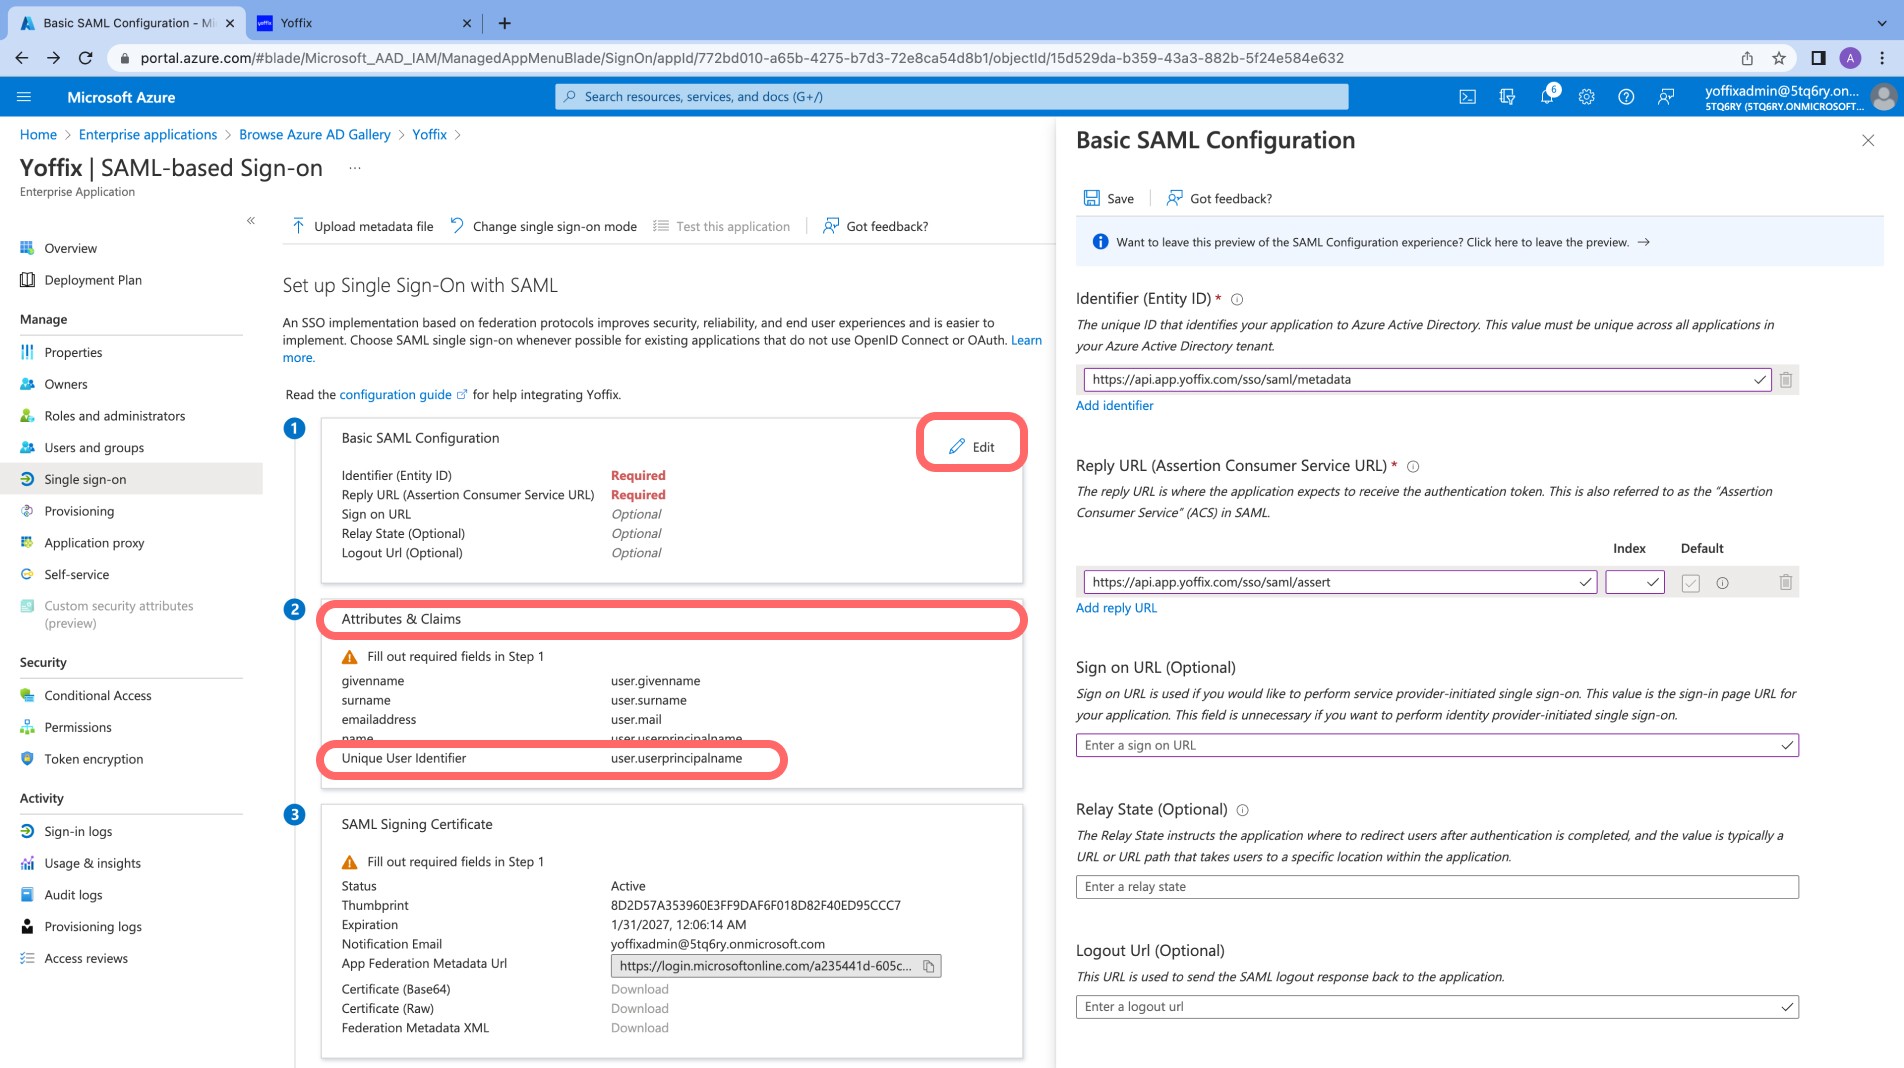
Change Source attribute to: user.mail
Click Save
Add Additional Claims
Under Additional claims, add:
emailfirst_namelast_name
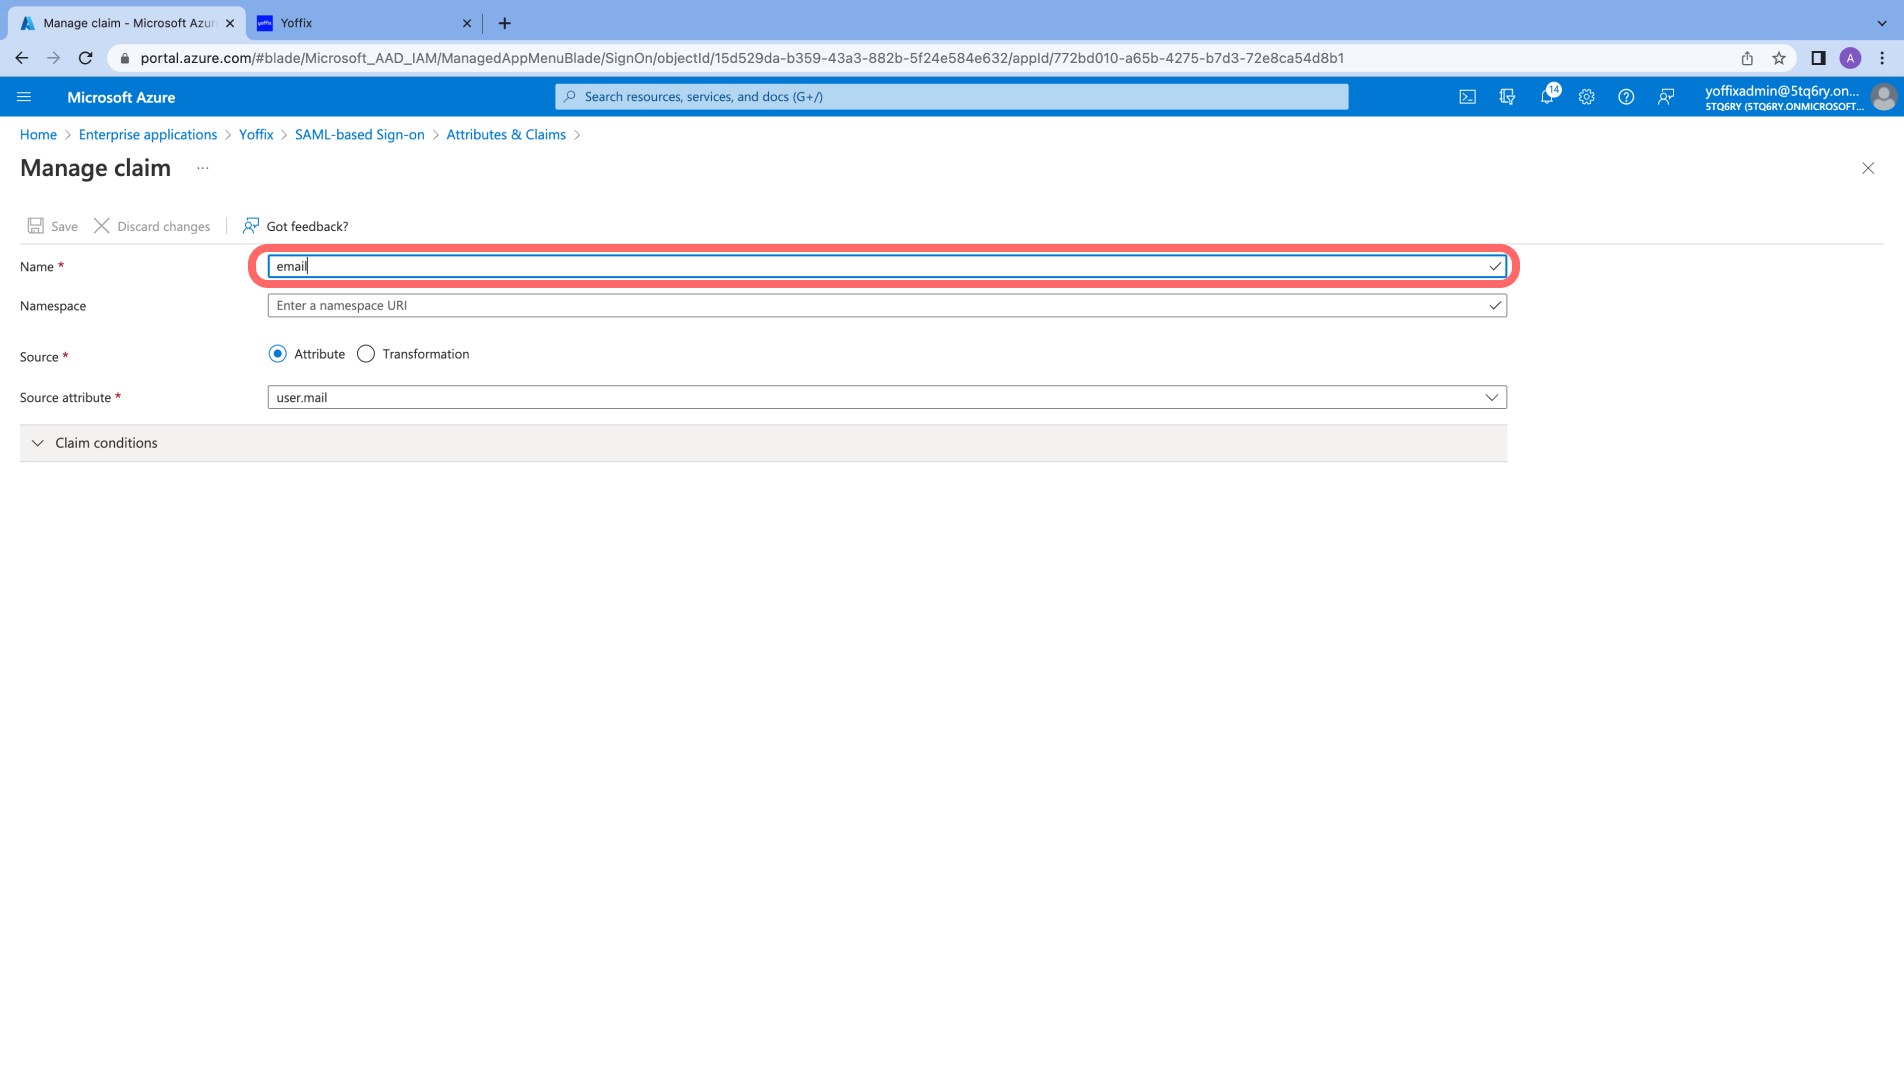


Namespace should be left empty for the added claims.
You may remove other claims if not required.
You should end up with the following attributes setup

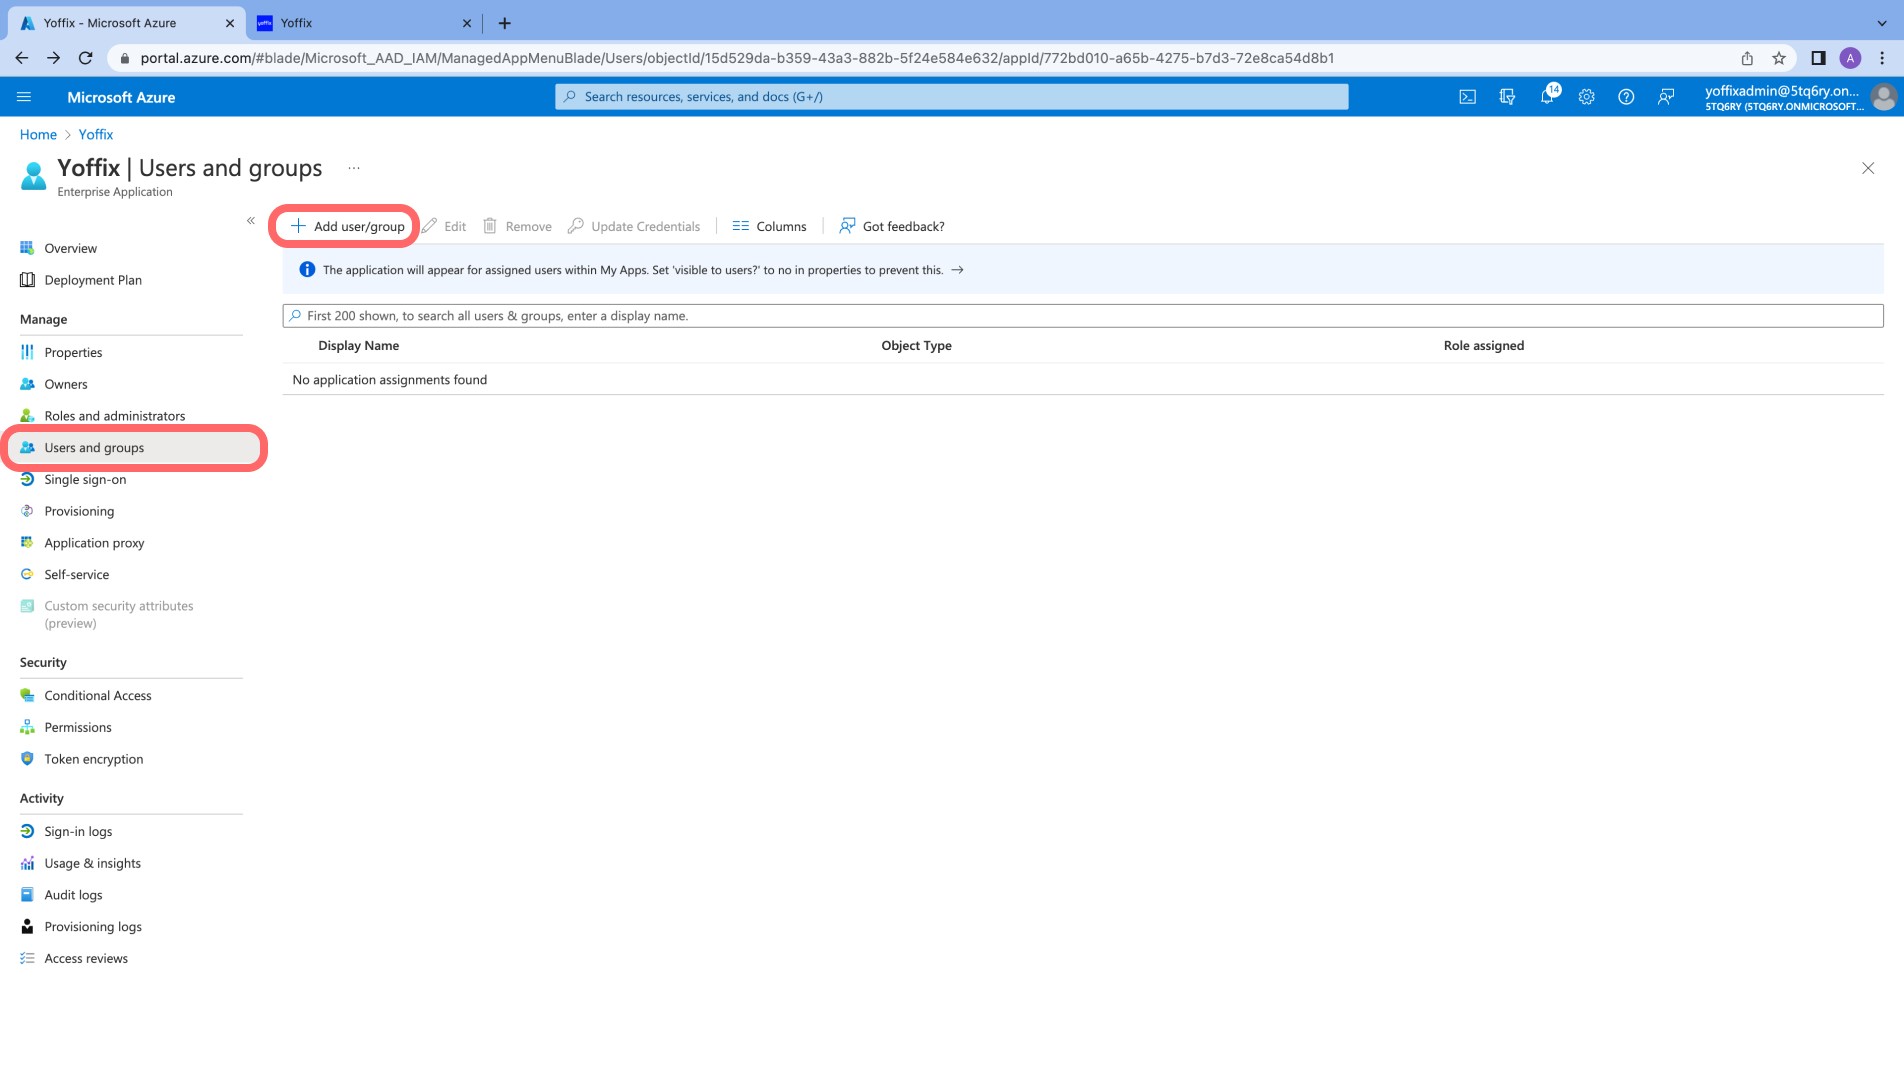
Step 5: Assign Users or Groups
Go to Users and groups
Click Add user/group
Assign the users or groups who should access Yoffix via SSO
Only assigned users will be able to sign in using Microsoft Entra ID.
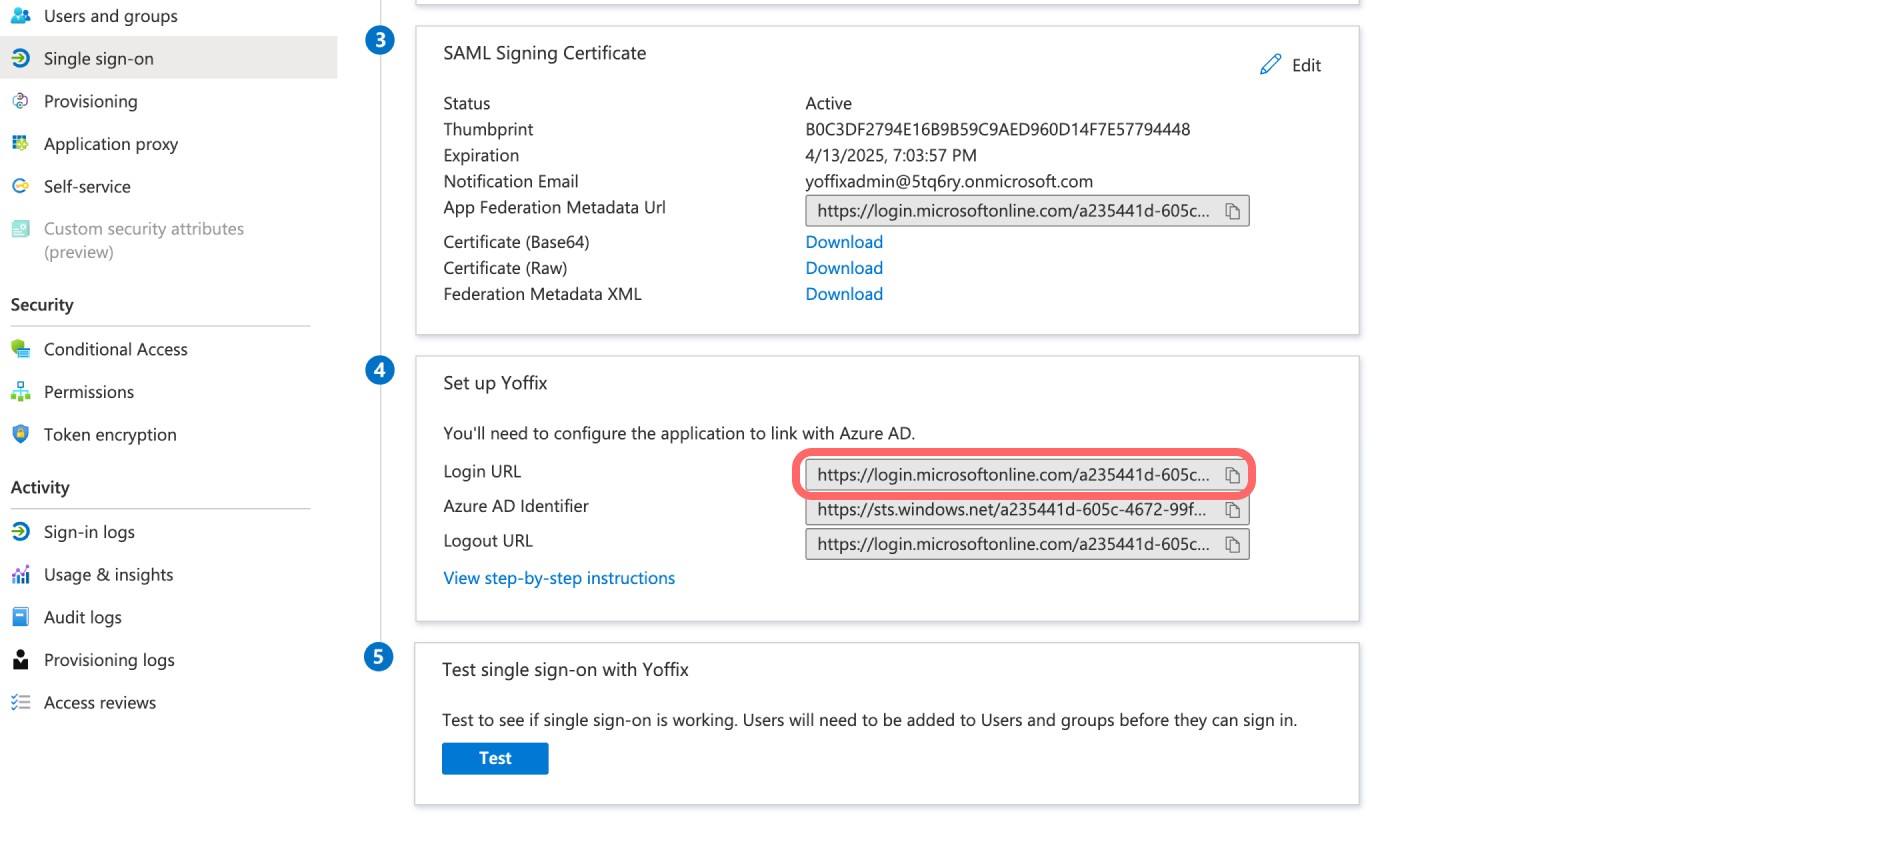
Step 6: Download Federation Metadata
Go back to Single sign-on
Click Download Federation Metadata XML
You will need this information for the Yoffix configuration.
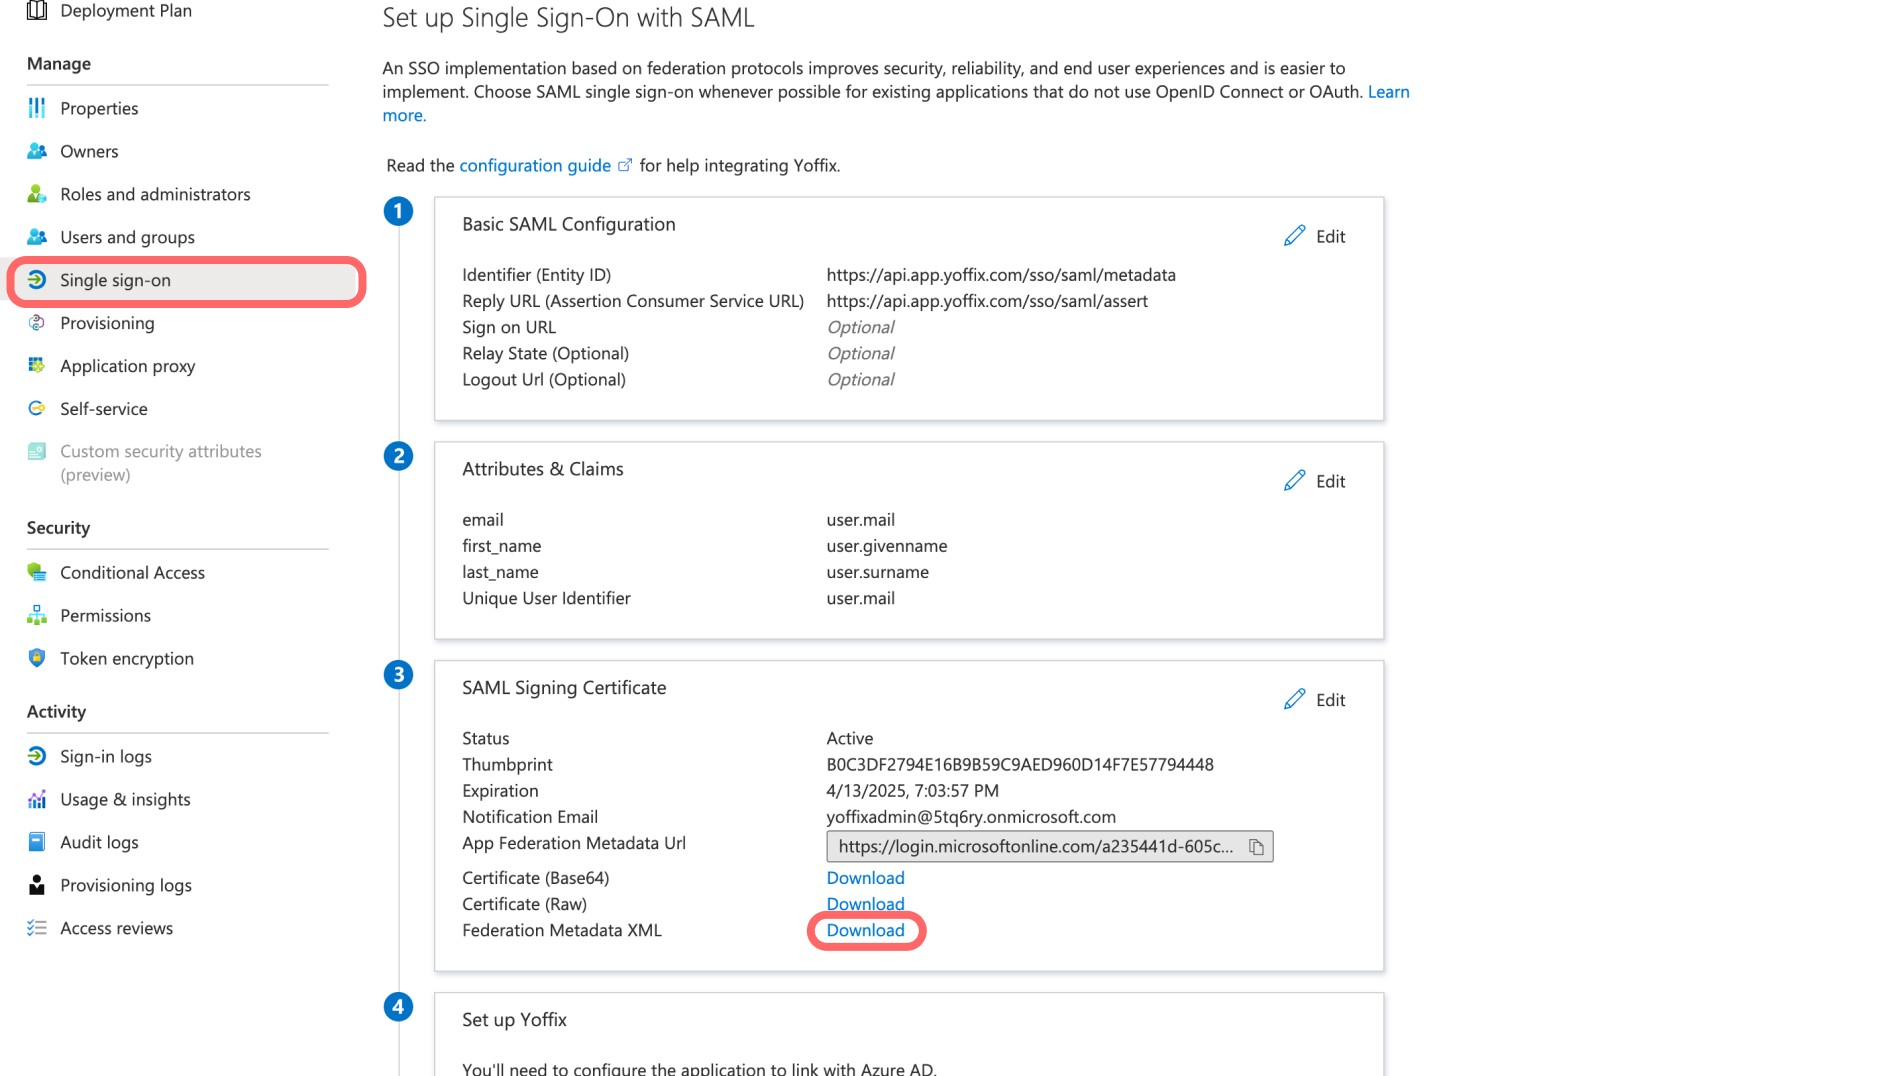
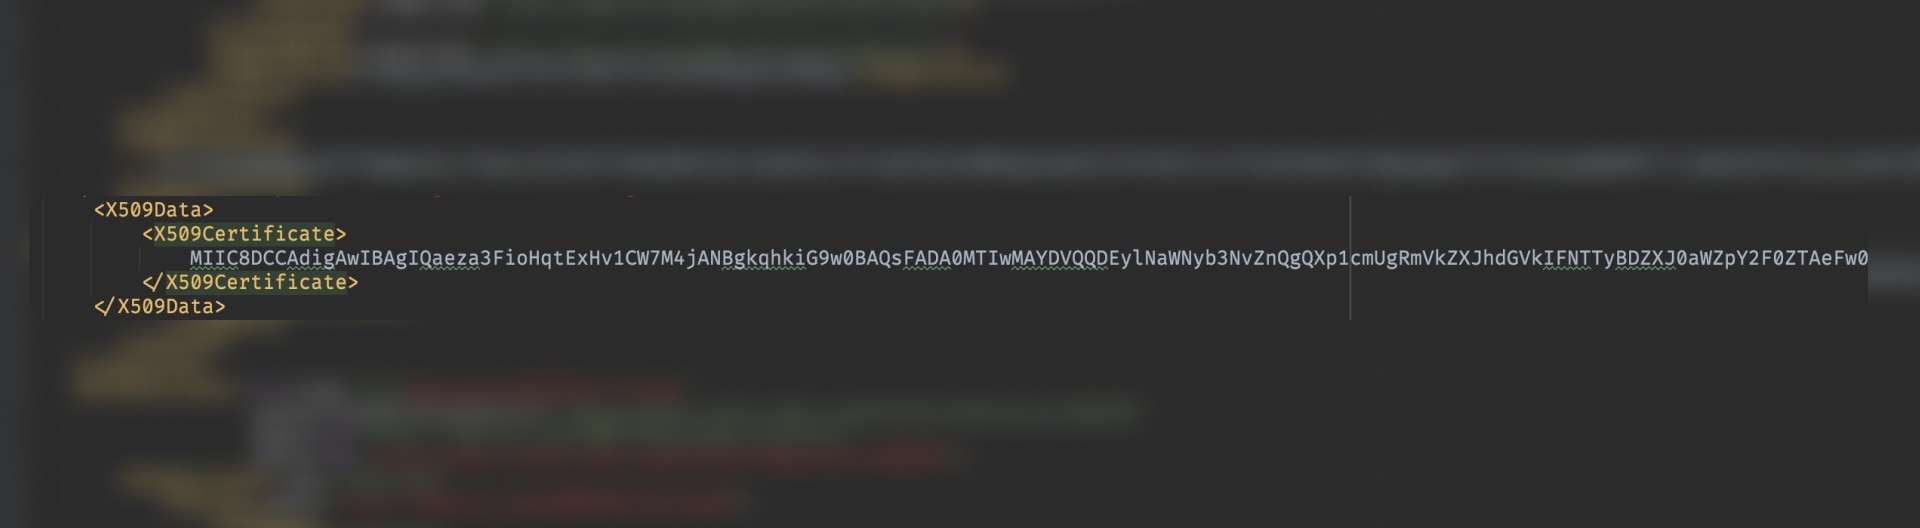
Open the file in your favourite editor and copy X509Certificate
Copy the Login URL from the Set up Yoffix section (4)
Configure SSO in Yoffix
Go to Settings → Integrations
Under the SSO section, select Microsoft Entra ID
Choose SAML
Provide the following details from your Identity Provider (IdP):
SSO URL (Login URL from Entra ID)
X509 Certificate
You can also define up to 10 email domains.
Example:
If your company email format is name@yourorgdomain.com, add:
yourorgdomain.com
Only users with these domains will be allowed to authenticate via SSO.
If you're still experiencing issues, contact Yoffix support at support@yoffix.com — our team will assist you.