Configure Google SAML SSO for Yoffix
Yoffix supports Single Sign-On (SSO) via Google Workspace using SAML 2.0.
This allows users to sign in to Yoffix using their Google Workspace credentials, ensuring centralized authentication and secure access control.
For other supported SSO providers please see the dedicated pages
All SSO configuration in Yoffix is available under:
Settings → SSO
Set Up Google SAML SSO Integration for Yoffix
Step 1: Log in to Google Admin Console
Go to:
Sign in with your administrator account.
Step 2: Add a Custom SAML App
Navigate to:
Apps → Web and mobile appsClick Add app → Add custom SAML app
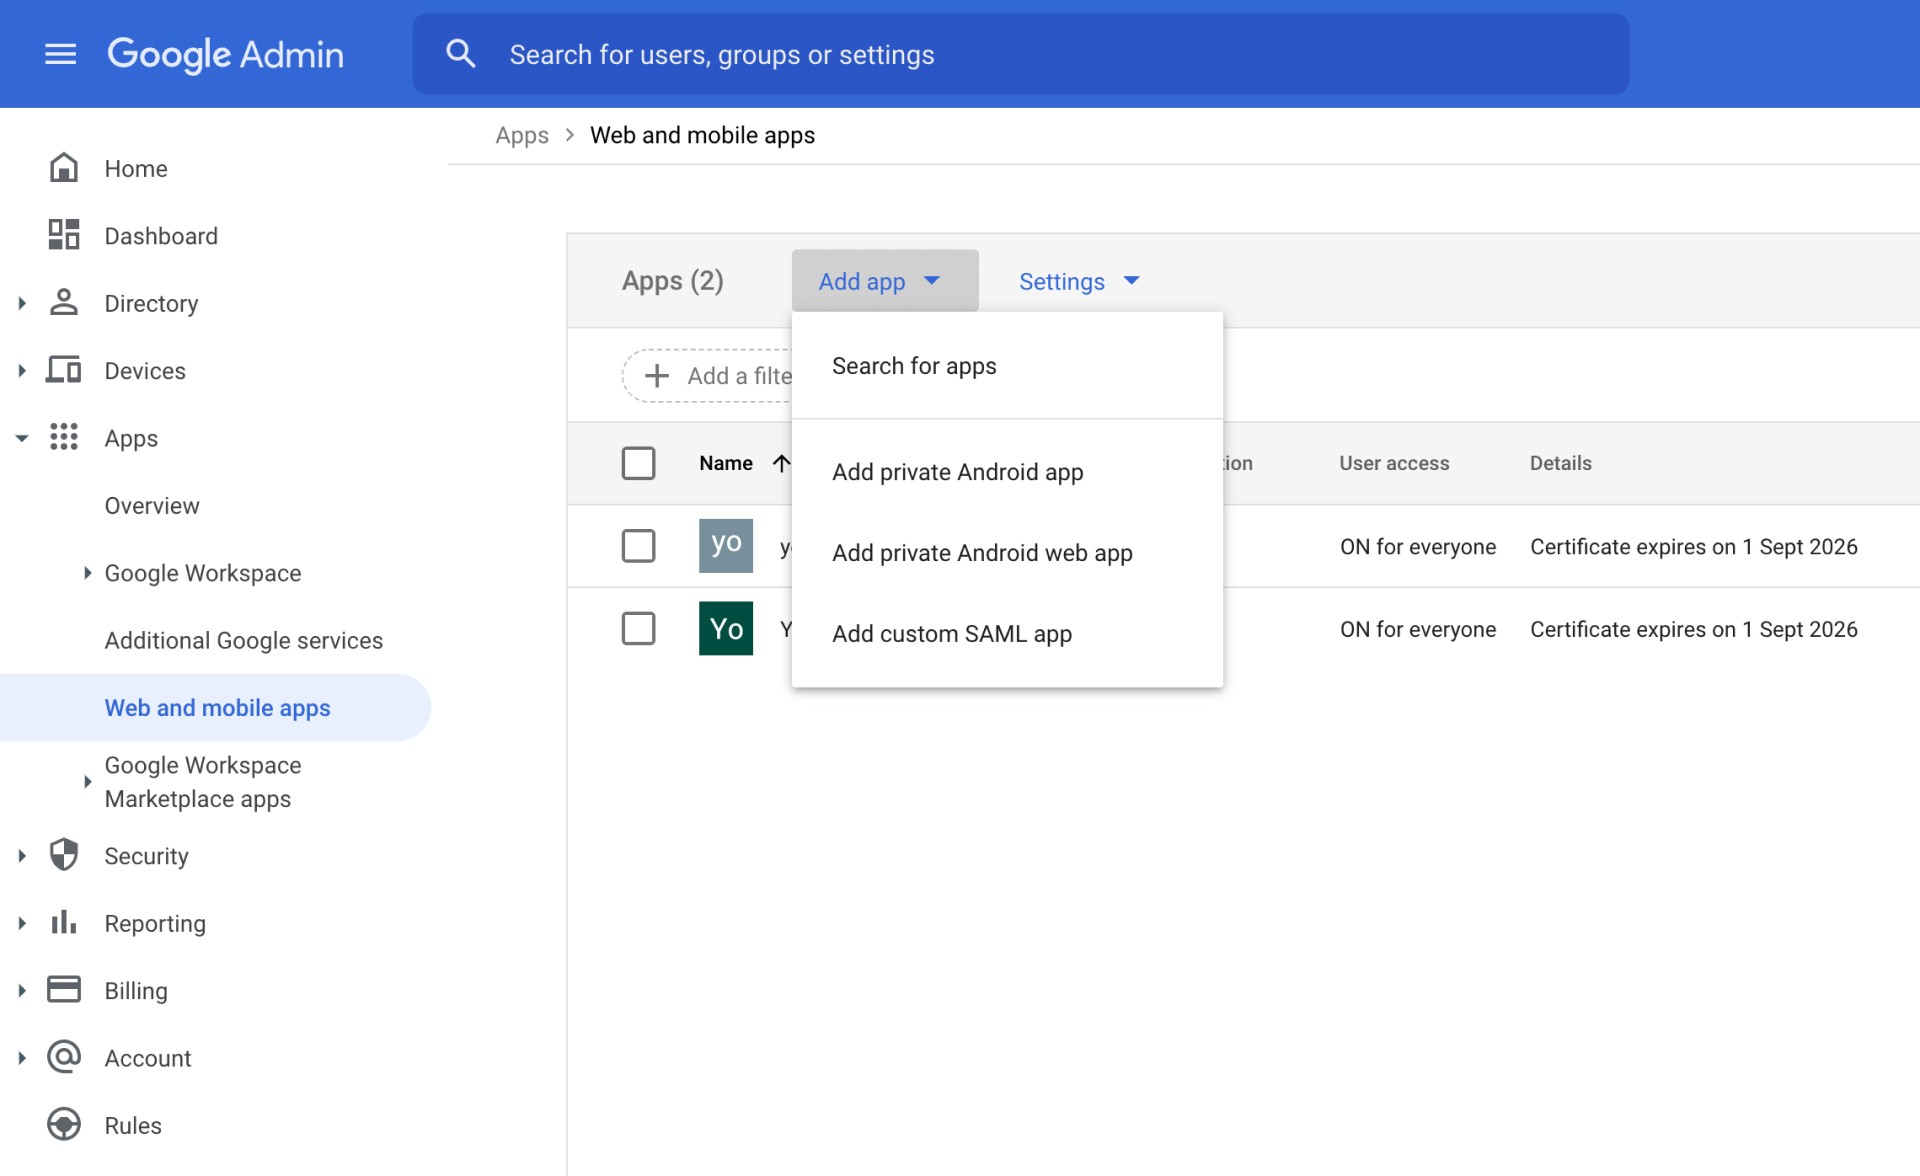
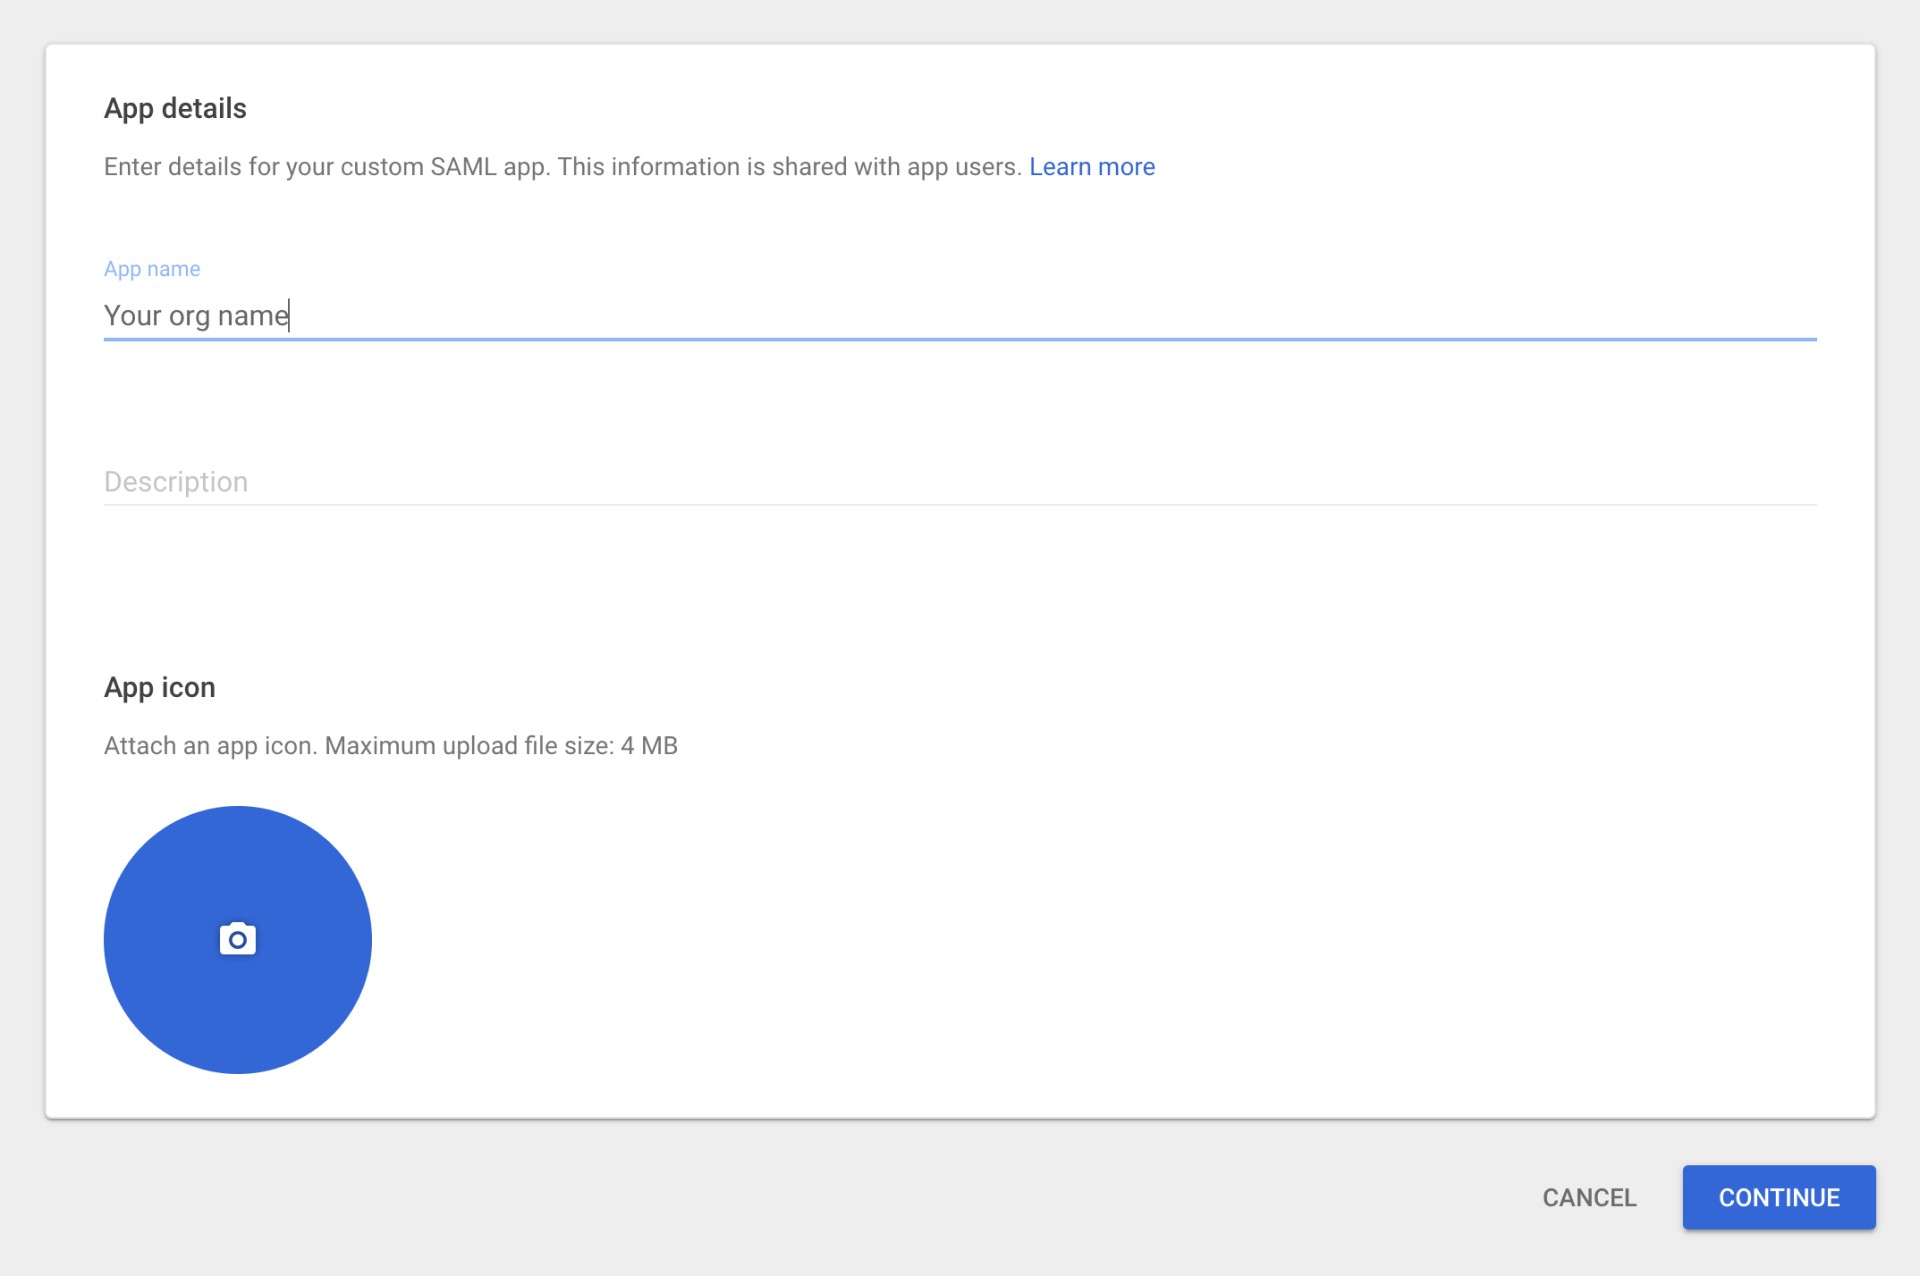
Enter your organization’s name as the App Name
Click Continue
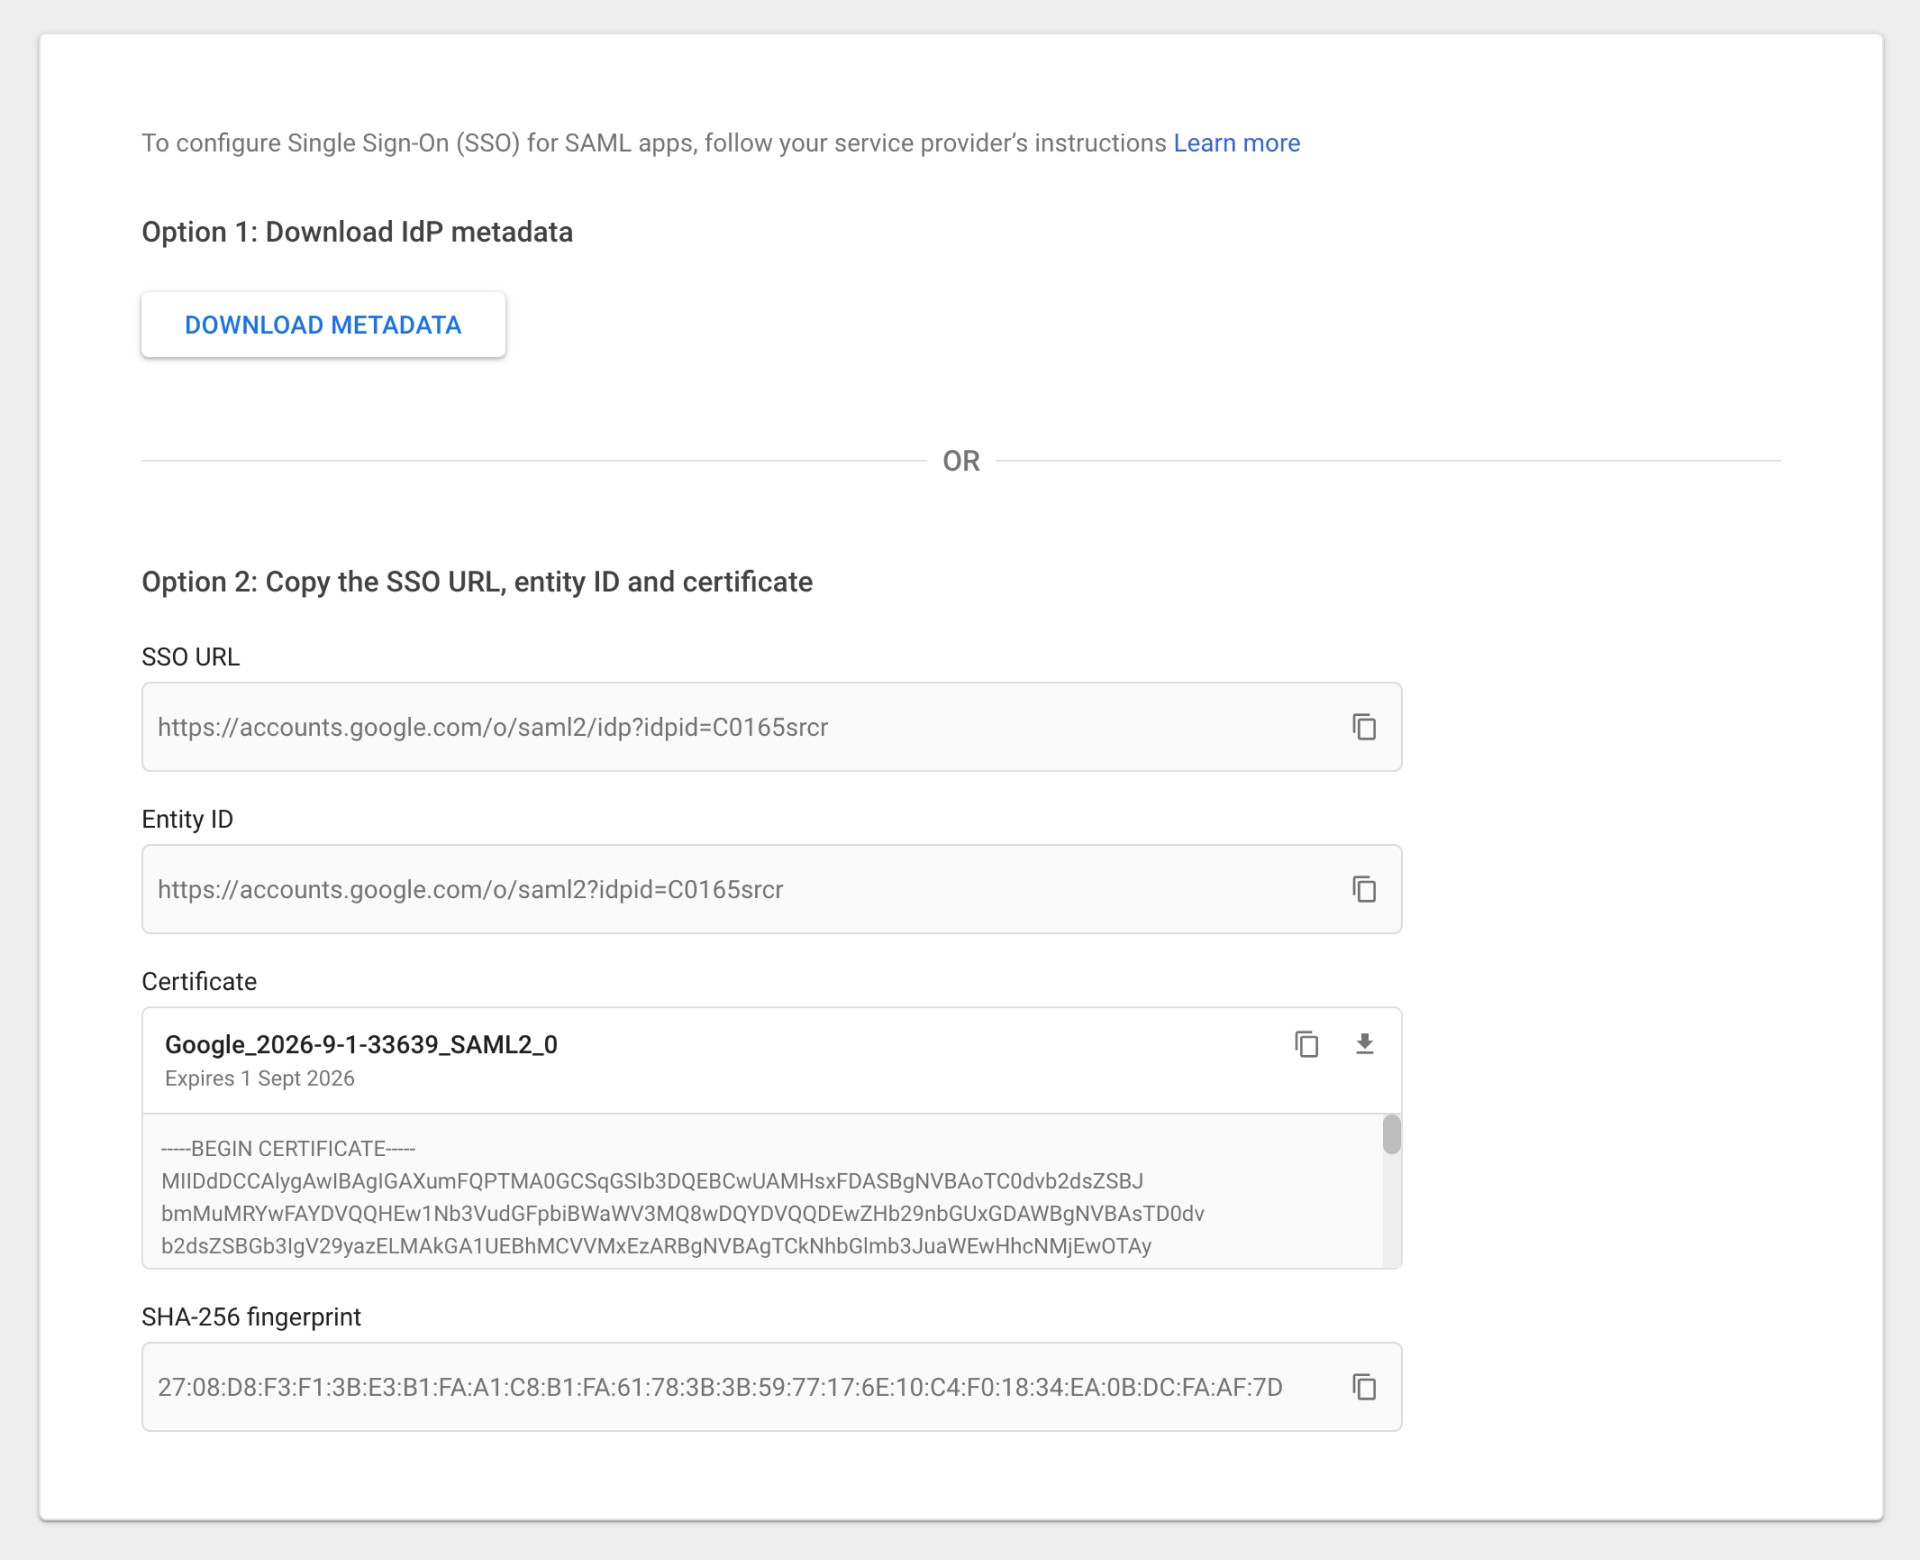
You will see the IdP metadata screen. Download the metadata now or after finishing the setup.
Copy SSO URL and save in your favorite text editor
Click Continue.
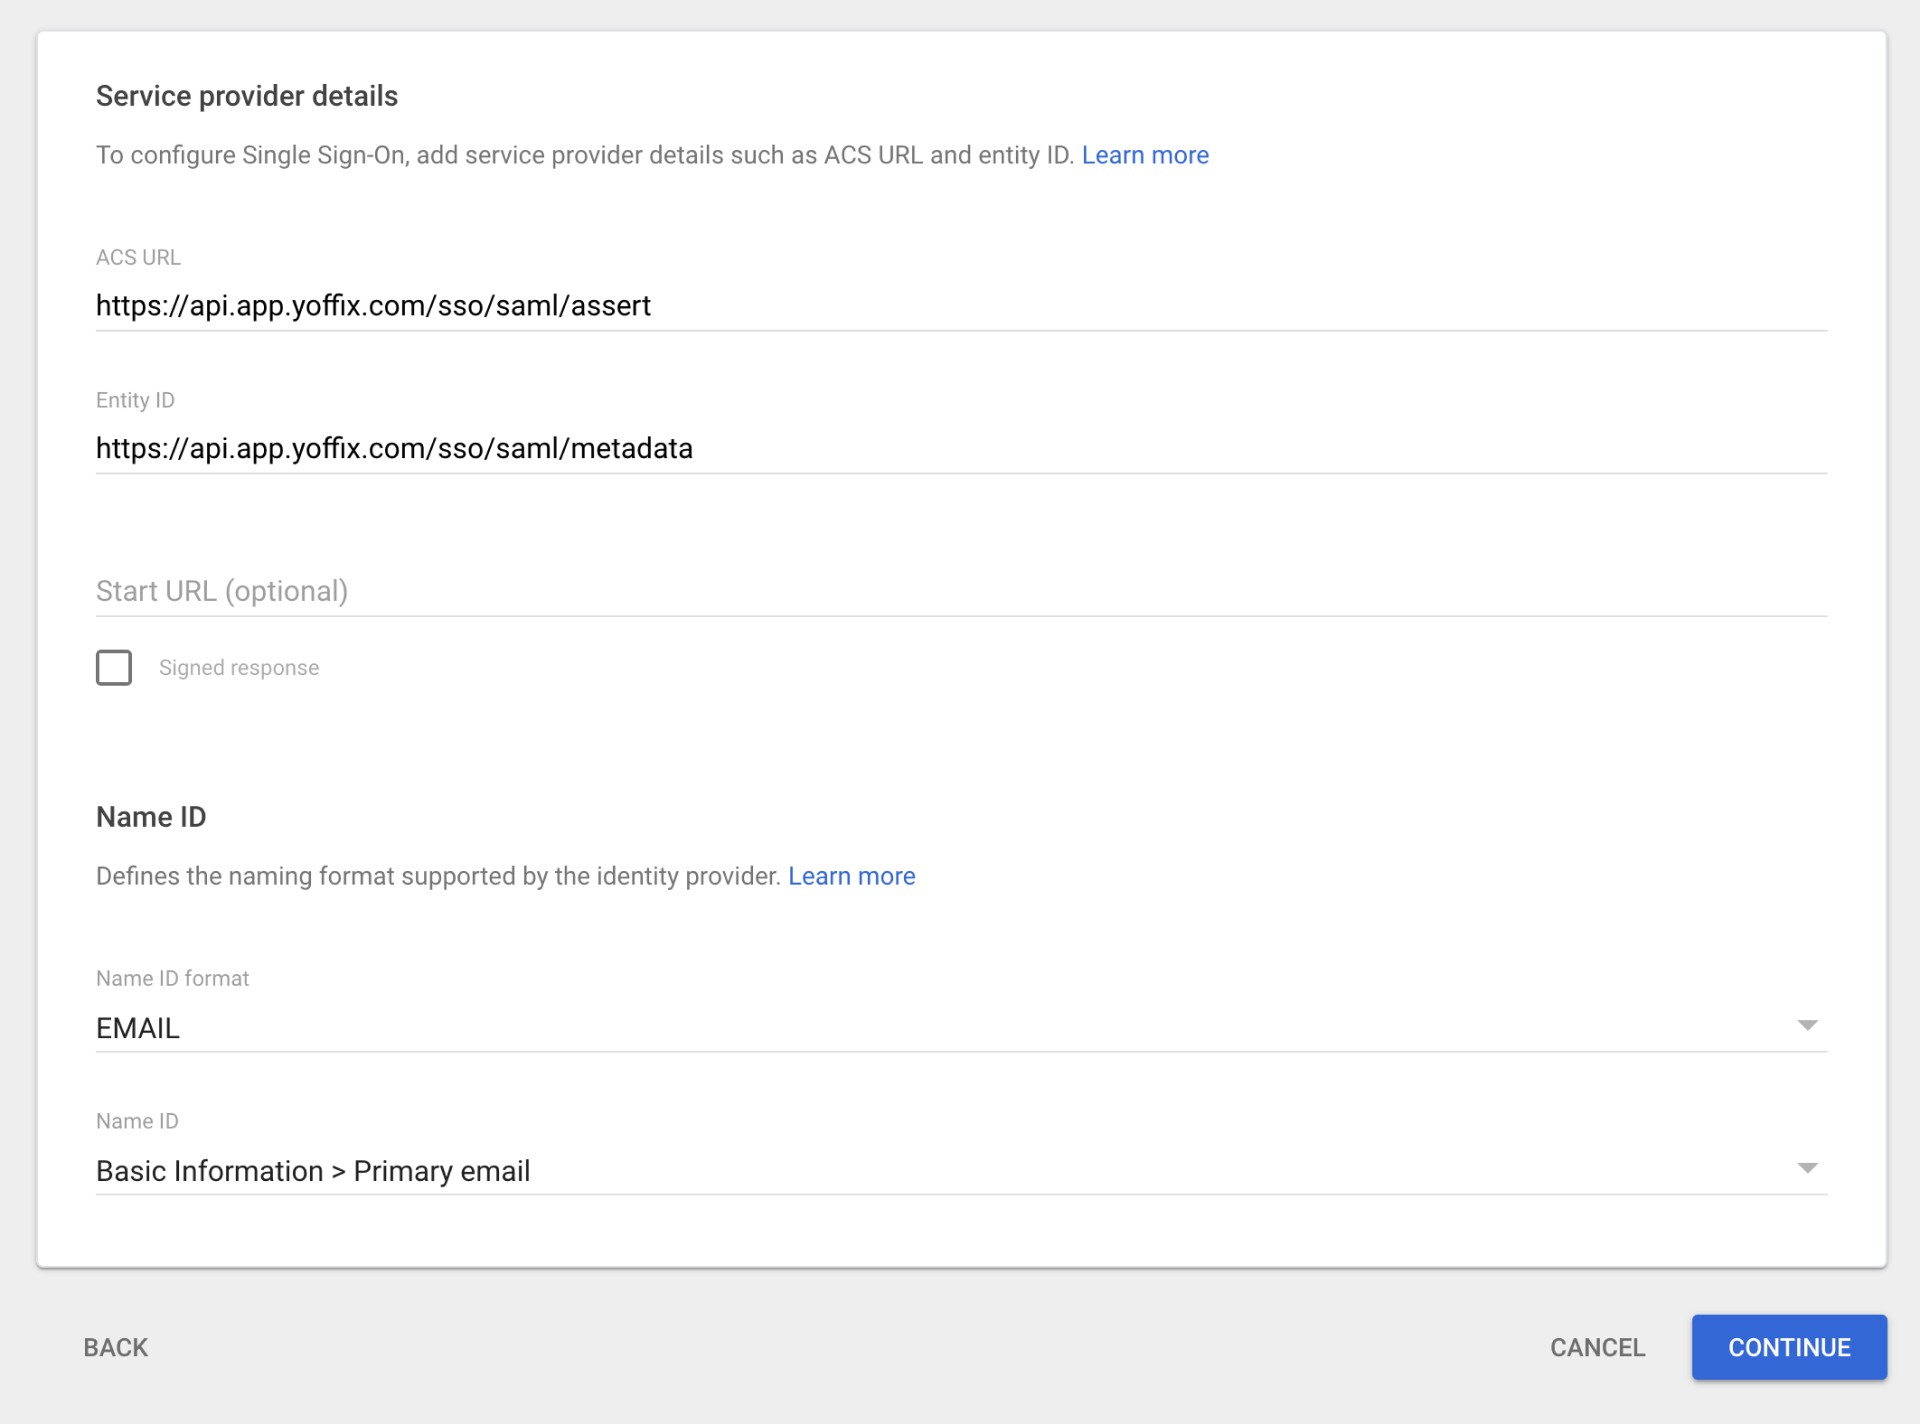
Step 3: Configure Service Provider Details
Enter the following values:
ACS URL:
https://api.app.yoffix.com/sso/saml/assertEntity ID:
https://api.app.yoffix.com/sso/saml/metadataStart URL: Leave blank
For Name ID format, select:
EMAIL
For Name ID, select:
Basic Information → Primary Email
Click Continue.
Step 4: Configure Attribute Mapping
Under Attribute mapping, add the following attributes (case sensitive):
email→ Primary Email (Basic Information)first_name→ First Name (Basic Information)last_name→ Last Name (Basic Information)
Click Finish.

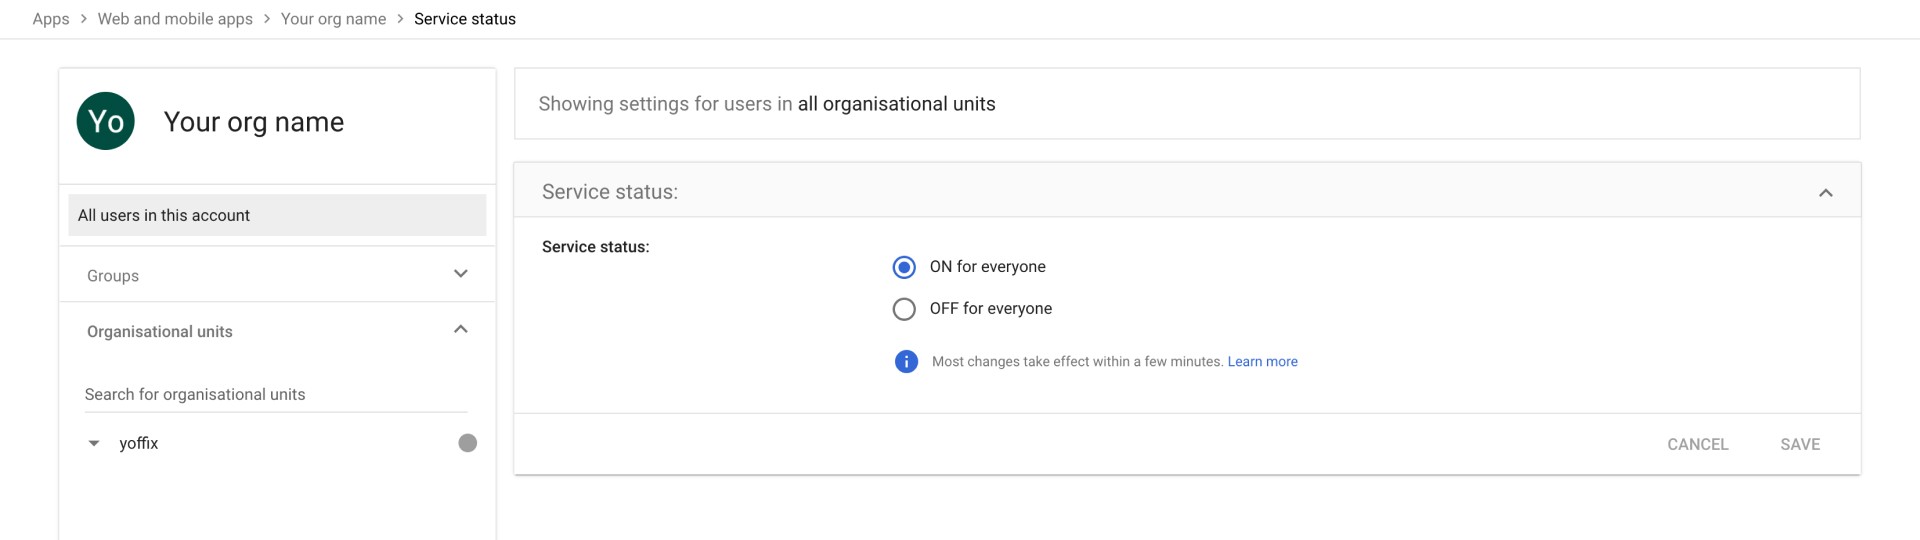
Step 5: Enable User Access
After saving the application:
Expand the User access section
Set Service status to ON for everyone
Click Save
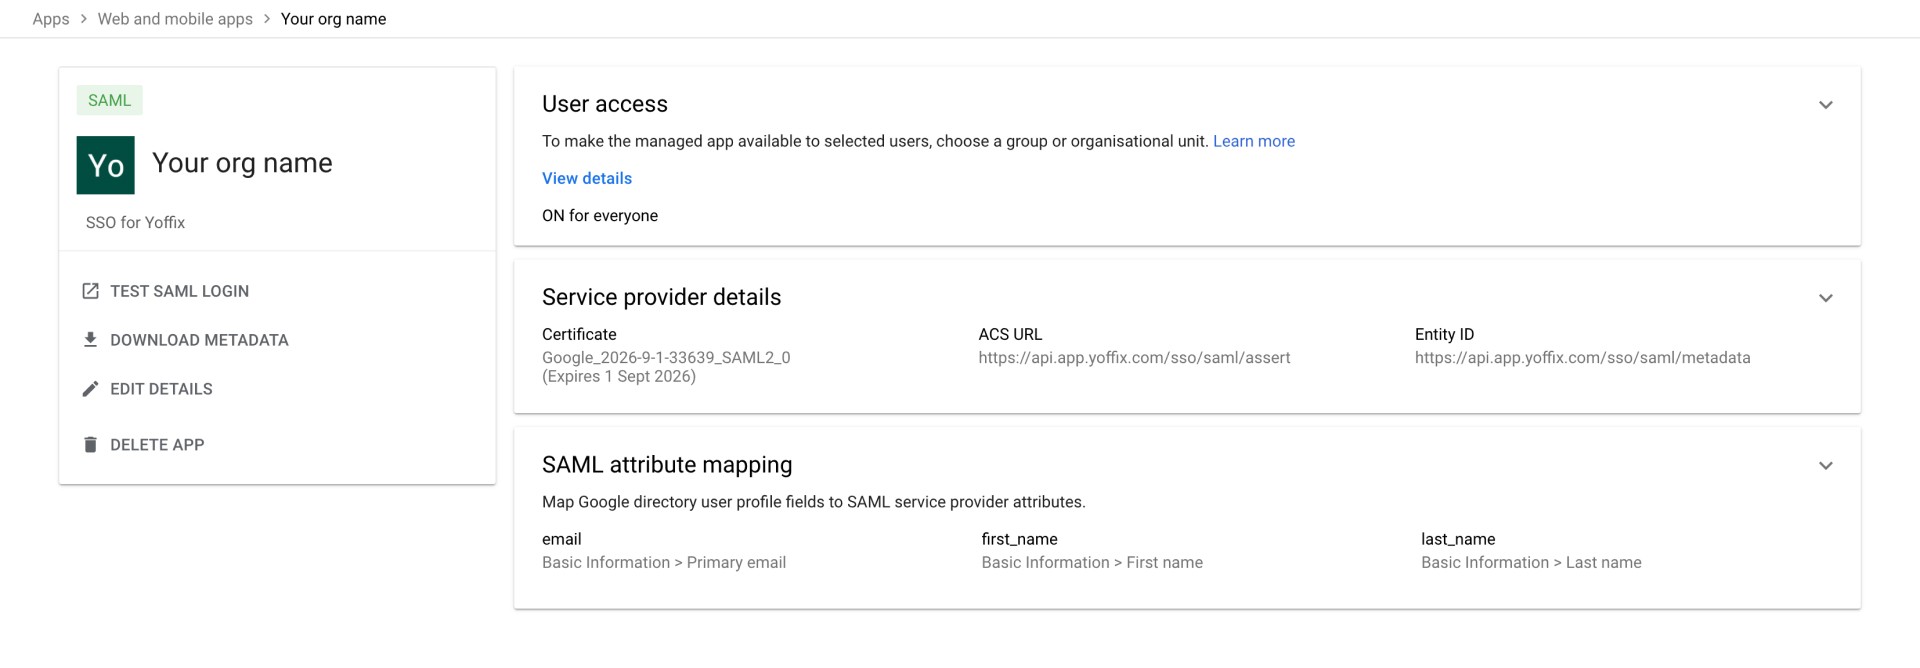
Your app information and IdP metadata will be visible on this page.
You will need this metadata for the Yoffix configuration.
Configure Google SSO in Yoffix
Go to Settings → SSO in Yoffix
Select Google
Select SAML
Enter the SSO URL from Google
Add email domain(s) of your organization
You can configure up to 10 allowed email domains.
Example:
If your company emails follow the format name@yourorgdomain.com, add:
yourorgdomain.com
Only users with configured domains will be able to authenticate via Google SSO.