How to Generate QR Codes in Yoffix
At a glance
This guide explains how administrators can create QR codes for desks in Yoffix and enable on-site desk booking and check-in via mobile.
Why Use QR Codes?
QR codes allow employees to:
Book desks directly on site
Check in quickly using their mobile device
Improve the overall desk booking experience
How to Create QR Codes for Your Workplace
Assign Seat IDs
Before generating QR codes, each seat must have a unique ID.
Go to Offices.
Select the office.
Click Edit.
Select a seat on the floor plan.
Assign a unique Seat ID.
You can structure IDs by floor, zone, or numbering logic (e.g., 10, 11, 12, 13).
Without a Seat ID, a QR code cannot be generated.
Generate QR Codes
Click Print QR Codes.
Select all seats with assigned IDs.
Click Print Selected.
A PDF file with QR codes will be generated and downloaded.
Print and Place QR Codes
You can:
Print the PDF yourself and attach QR codes to desks
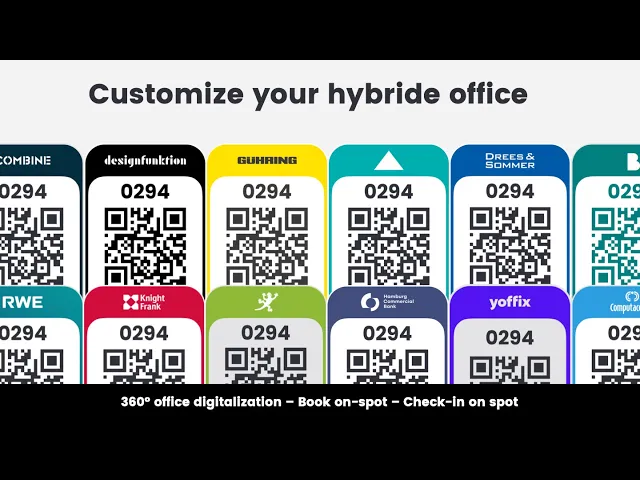
Order professionally printed QR code stickers in your corporate design
Branded QR codes can be requested via your Yoffix customer support manager.
Enable Check-in via QR Codes
To start using QR codes for check-in, enable it in your account and office setting.
Go to Company Settings → Notification center → Check-in ON.
In the Platform for check-in dropdown, select QR-code.
Make sure QR code is on as the check-in option in the office settings as well.
Go to Office Setup, locate your office panel, click : on the right-hand side and select Settings.
Scroll down to Check-in → Desk booking and/or Room booking, enable check-in and select QR-Code as the check-in platform.
How Employees Use QR Codes
Once placed on desks, employees can:
Check in at their desk
Instantly book a desk
Instantly book a room
This enables faster desk booking and a smoother hybrid workplace experience. Learn more about check-ins via QR-codes.
If you want to order QR codes in your corporate design, please contact your Customer Success Manager or write us at support@yoffix.com