After you have uploaded a floor plan to your space or office, you can create and allocate desks & meeting rooms. Watch our video tutorial to learn more
With Yoffix you can easily add, edit and delete workspaces & rooms in your office. You can also allocate desks to single employees or departments, block them, or make them flex desks. Meeting rooms can be allocated to specific department(s).

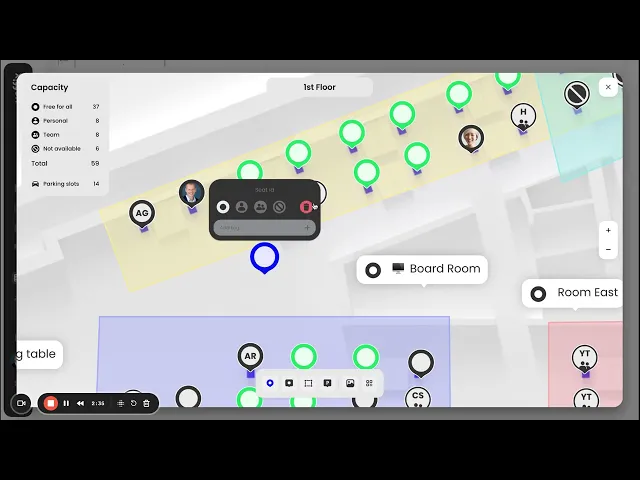
Creating and allocating desks
Click Add seat at the bottom

Click on the floor plan where you want to create a new seat

Select Free for all if the desk is available for everyone to book
Select Personal if only one person should be able to book this desk, and select that person from the list
Select For team if only members of specific teams should be able to book this desk
Select Not available if you want to block this desk
Delete a desk by clicking the Remove desk symbol

Setting up QR codes
If you want to enable the option to book seats or check in via QR codes later, please follow this instruction. If you will not be using QR codes, you can skip this section.
Add a seat ID to every seat. Seat IDs can be combinations of numbers and letters of up to 8 characters.

Click the QR code symbol at the bottom and select the seats
Click Print selected. A PDF file with the codes will be downloaded
Now you can print the codes and place them on desks in the office. To book a seat or check in, employees will have to scan the code using their phone camera.
We can provide customized QR codes in your corporate design upon request. Please contact us at support@yoffix.com to discuss this further.


